
Our funding comes from our readers, and we may earn a commission if you make a purchase through the links on our website.
How To Enable Microsoft SNMP on Windows 7 Local and Remotely
UPDATED: August 29, 2023
Settings up Microsoft SNMP Service on Windows 7 locally and remotely is something that many admins need to do in their network environments in order to monitor all desktops in their network properly using SNMP.
In order to do this, Windows 7 SNMP Service needs to be installed and configured in order to allow Network monitoring and management software to poll them in order to get information about them.
Automatic Installing and Enabling SNMP Service (Local and on Remote PC/Servers)
Below we've highlighted the manual way of installing and enabling SNMP service on your Windows 7, 2008 Server and 2012 R2 Server installations – its a little hands-on as you can see from the tutorial, so we've added this cool tool/utility we found from SolarWinds to enable snmp on your local machine and on your Whole network from one place.
- Download and Install the SNMP Enabler for Windows utility from SolarWinds
- Run the Utility and specify which IP Address you like to remotely Install and Enable SNMP service on.The Utility also allows you to Bulk Enable the Service on multiple Windows 7, Windows 8.1, Windows 10, Windows Server 2008 and Windows Server 2012 R2 by Importing a File with all the IP Addresses listed in there via the “Import” button.(You can export a list of all IP Addresses used from within DHCP server and import into this utility)
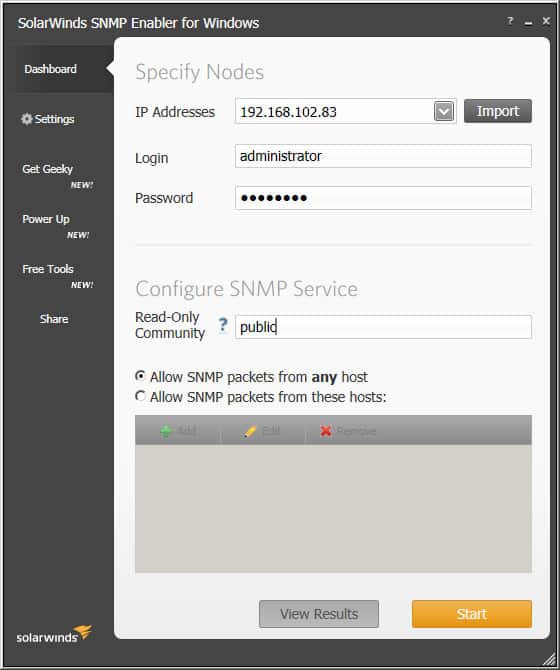
- Click the Start button and the utility will go to each IP Address specified and check whether the SNMP Service has been installed already (if it has not, It will Install SNMP Service on that remote server/desktop) and then configure the Community String for you.When it has completed, you will see a screen like the once below:
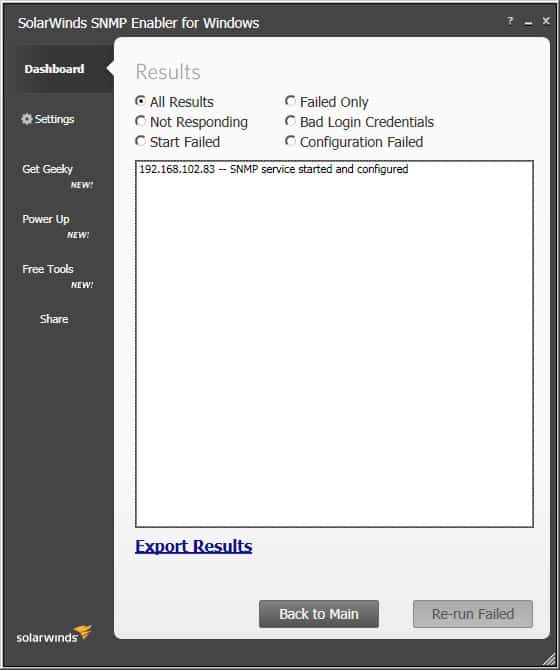


At this point, SNMP Service will be installed along with the Community String enabled and ready to send data out.
Manual Install on Windows 7/2008 Server and 2012 R2 Server
Note: Make sure your using an account that is a member of the “Local Administrators” group or else you'll have issues with the process below.
-
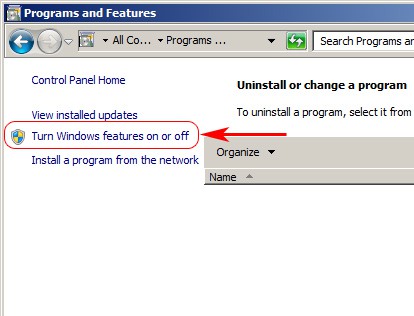
Start > Control Panel > Programs and Features
-
On the Left Sidebar Menu, click on Turn Windows features on or off in the left-hand side of the page.
-
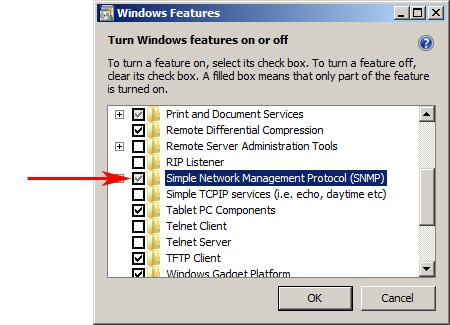
When the “Windows Features” dialog box opens, scroll down and check the “Simple Network Management Protocol” box (see image below), and then click OK.
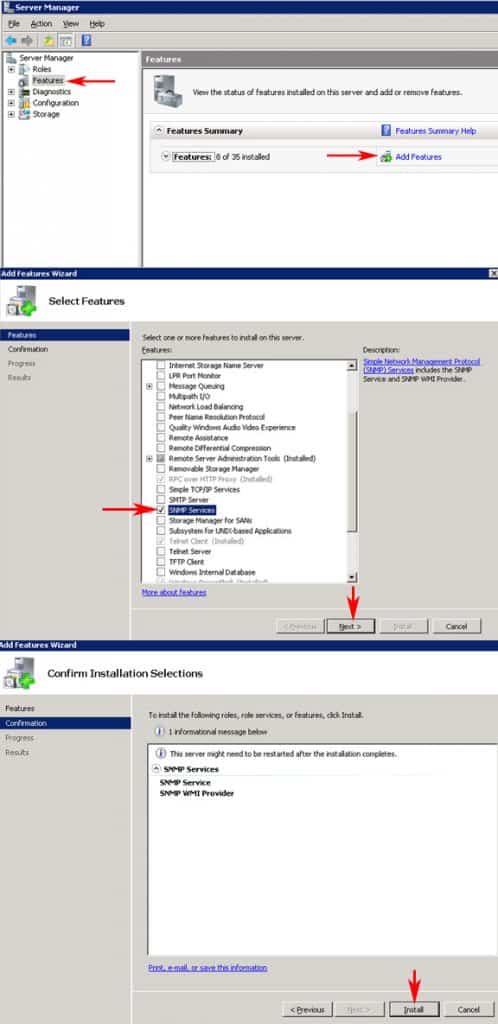
- For Microsoft Windows 2008 Server, the Server Manager dialog box will open. Click on Features on the left menu, and in the Features dialog box on the right side, click on Add Features and then scroll down and check the “SNMP Services” dialog box and click Next and then click Install. See screenshot below:
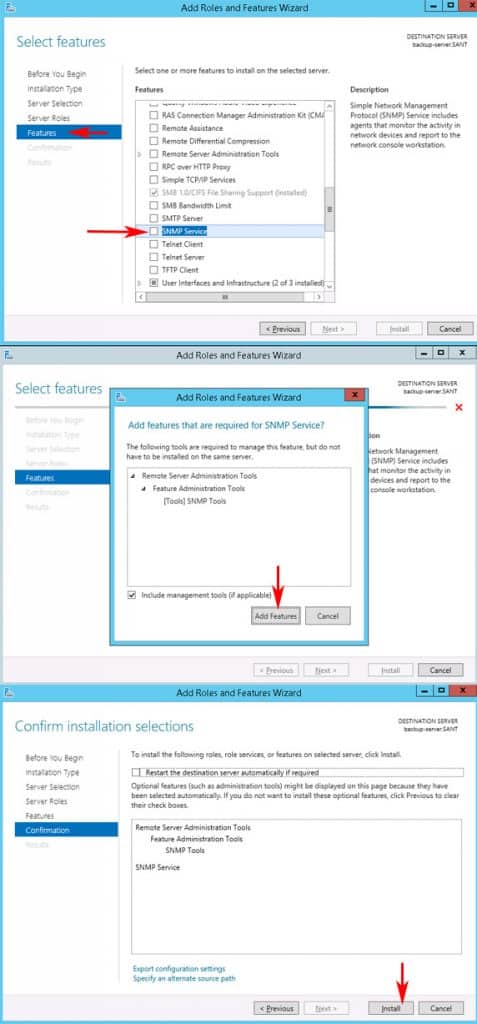
- For Microsoft Windows 2012 R2 Server, the Add Roles and Features wizard will open, click Next for “Role-based or feature-based installation” and then click on Features >
scroll down to SNMP Service and check box > Click Add Features when pop-up box asks you to confirm SNMP Tools installation > Click Next > Click Install. See the screenshots below for step-by-step tutorial:
- For Microsoft Windows 2008 Server, the Server Manager dialog box will open. Click on Features on the left menu, and in the Features dialog box on the right side, click on Add Features and then scroll down and check the “SNMP Services” dialog box and click Next and then click Install. See screenshot below:
-
At this point, you may be Prompted to Insert a Windows 7 Installation disc or may not, depending how you installed your Operating System.
-
The SNMP Service is now set to automatically start with your PC.


You will also need to manually specify a community string within the SNMP service window, as they automatically specify on when you install the service itself. To do so, follow the instructions below:
- Start > type in services.msc and press Enter Key to open up the Services Dialog box
- Scroll down to SNMP Service and double-click on it to open up the dialog box for that service
- Click on the Security tab
- Make sure the “Send authentication trap” check box is Checked
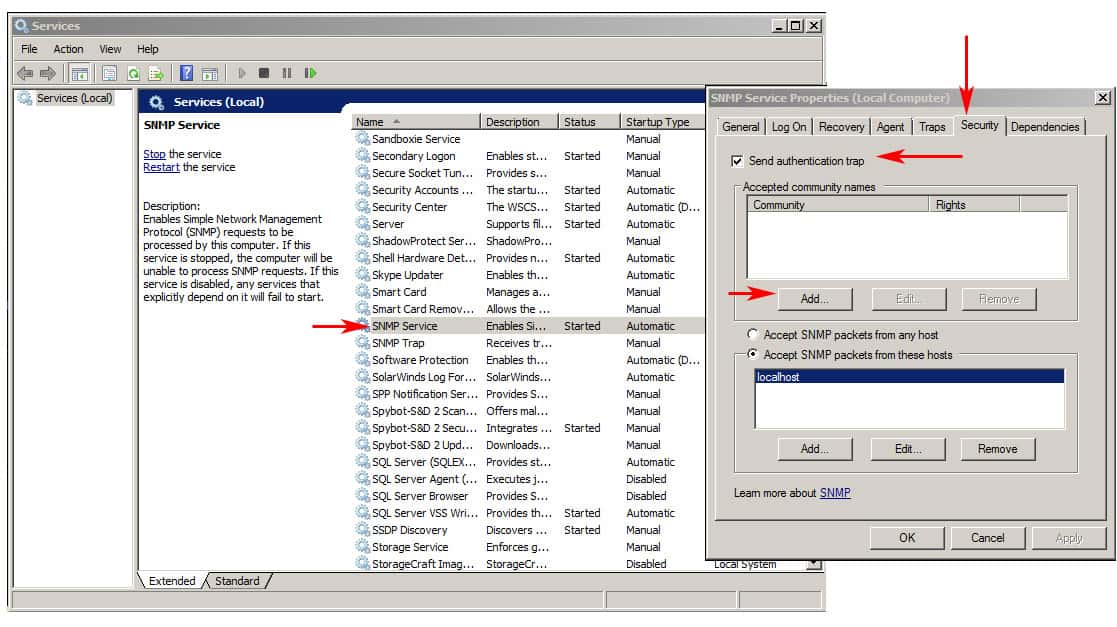
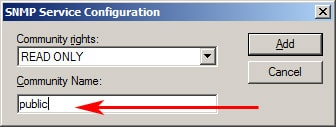
- Click “Add” under the “Accepted community names” and add your Community name into the given text field and make sure “READ ONLY” is selected in the Community rights field, then click the ADD button.
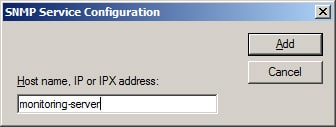
- In the field right below the Community string names, you'll have the option to specify which hosts can poll the device for SNMP information by adding either an IP Address or Host Name – we suggest you add your Host name of your monitoring server to ensure that is the only machine allowed to poll for data.


You should now be able to monitor the given machine using SNMP services, whether its a Windows 7, Window 8, Windows 10 or Windows 2008 Server or Windows 2012 R2 server.
If you want a quick and easy way to Enable this service without going through the hassle of manually doing it, definitely consider grabbing the FREE Trial from SolarWinds to do it from the Link below.


SolarWinds NPM SNMP Enabler for Windows Start a 30-day FREE Trial!
Related Articles:
What is SNMP? Basic Tutorial on NMS, MIBs, OIDs, Traps & Agents
SNMP Traps Explained – A Full Breakdown of What it Does!
SNMP Monitoring Tools & Software for Servers & Network Devices
SNMPSoft Syslog Watcher Review