
Our funding comes from our readers, and we may earn a commission if you make a purchase through the links on our website.
What is Share and Storage Management for Windows Servers?
UPDATED: February 7, 2023
Like other servers, Windows Server 2008 purpose is to store company files and data. It is one of the robust operating systems with the best features for servers. Nowadays, many organizations are exploiting and deploying services and roles to different types of servers. However, file serving is one of the vital functions managed by the servers. These file servers provide a central location to store and share files across the network. Therefore, they turned out to be one of the best applications to introduce networking to various organizations. We will discuss a few tools in this post that will aid in the proper administration, configuration, and management of shared files and folders in Windows Server 2008.
Steps to Activate File Service Roles and Management Tools
Windows Server 2008 does not comprise file serving capabilities at the time of installation. However, it is a good thing as Microsoft introduced updated in-built role-based capabilities in Windows Server 2008. As a result, this feature helps keep your operating system secure at all times, even at the time of attacks.
To further add the File Services role, you must follow these steps:
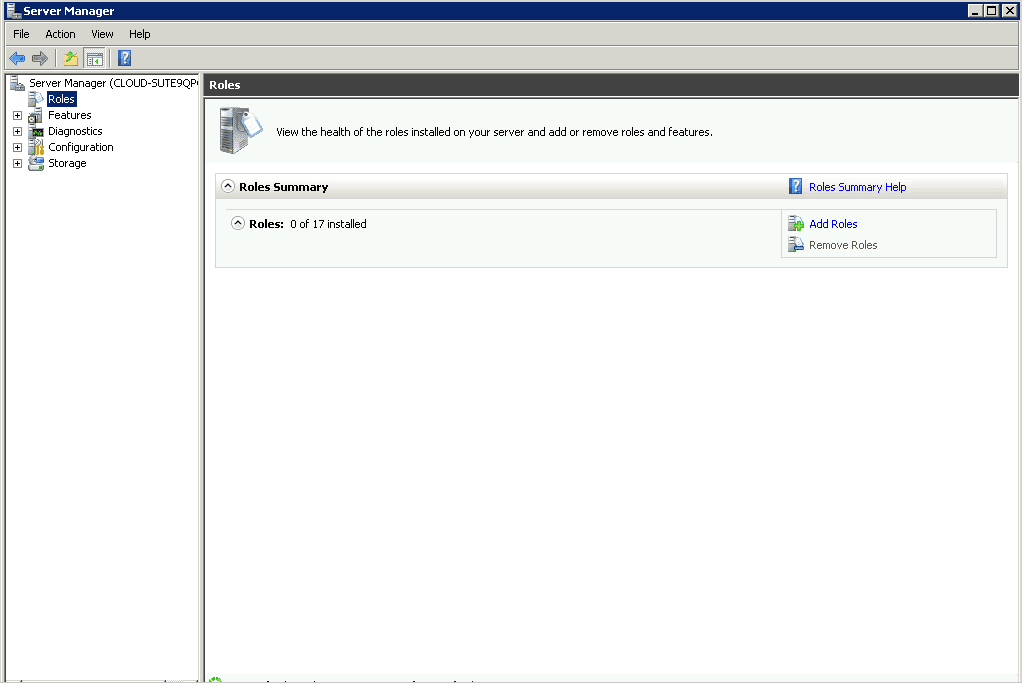
- Step 1 Firstly, you must start the service manager. Go to Start>All programs> Administrative Tools and click Server Manager.
- Step 2 Now, from the navigation panel, select Roles.
- Step 3 A role management screen will display in the work pane. Under Roles Summary, select the option to add roles.
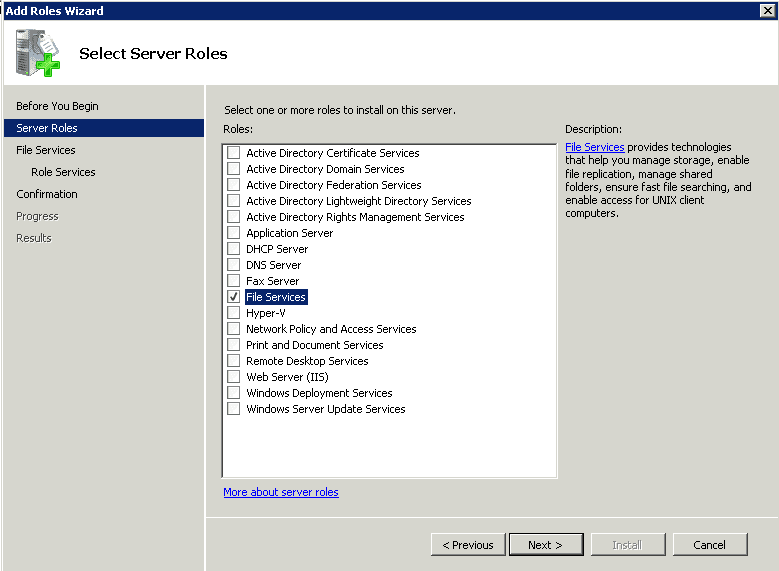
- Step 4 A Select Server Roles dialog box will appear. Choose the file services option from the list and press the next button.
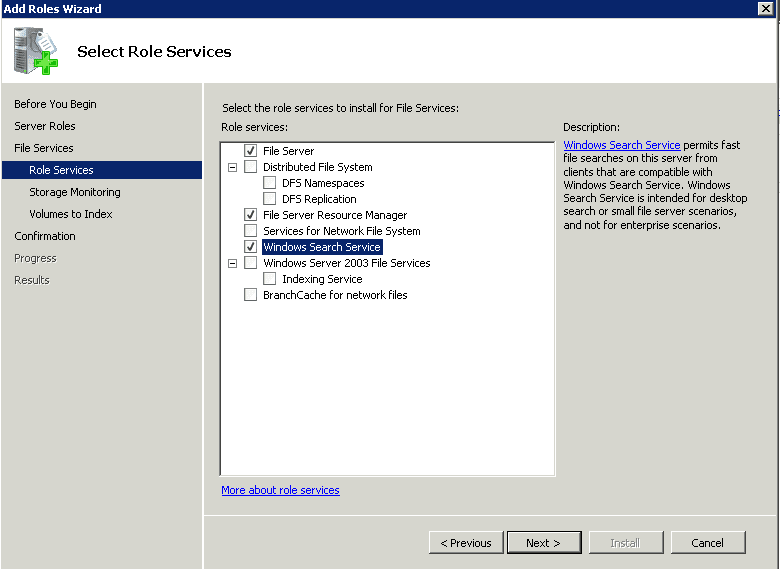
- Step 5 Select the Role services under File services as per your requirement and click on the Next button. Make sure to select the File Server Resource Manager and Windows Search Service apart from the File Server services.
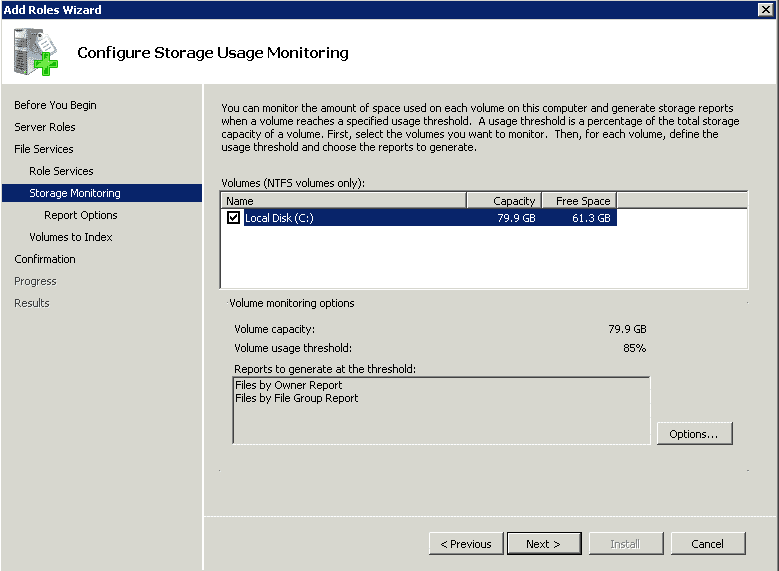
- Step 6 In the Configure Storage Usage Monitoring dialog box, decide the volumes for monitoring. Then, press the options tab to edit reports or change the thresholds, after which the alters will be sent.
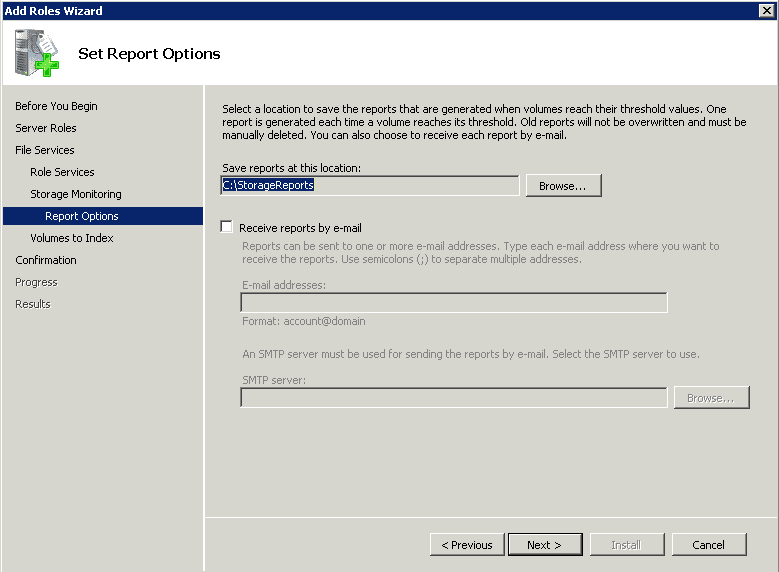
- Step 7 Under Set Report Options, select locations where you want to save storage reports. As per the default setting, the location is C:\StorageReports.
- Step 8 As per the shared image, if you select Windows Search Service (helps find files easily), choose volumes to be indexed and press Next.
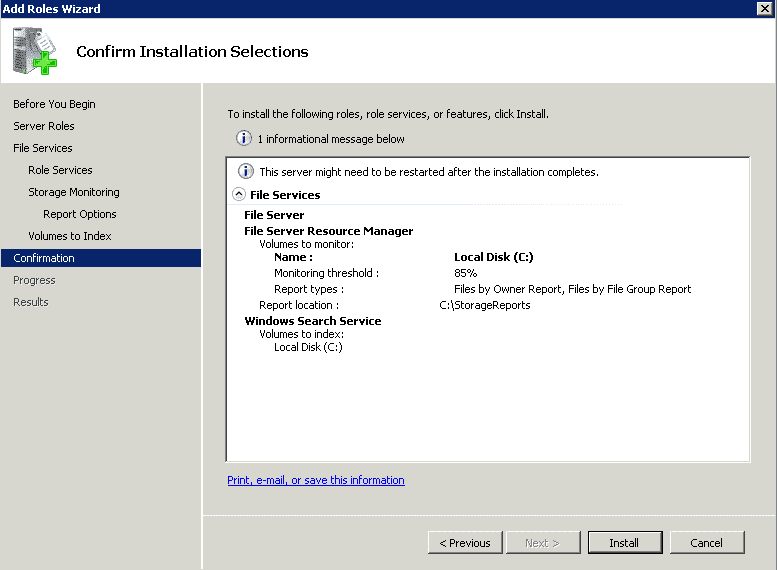
- Step 9 Press Install to confirm the installation of the File Services role.
The installation process will hardly take a minute or two. Once the installation has been completed successfully, you will get the following screen:
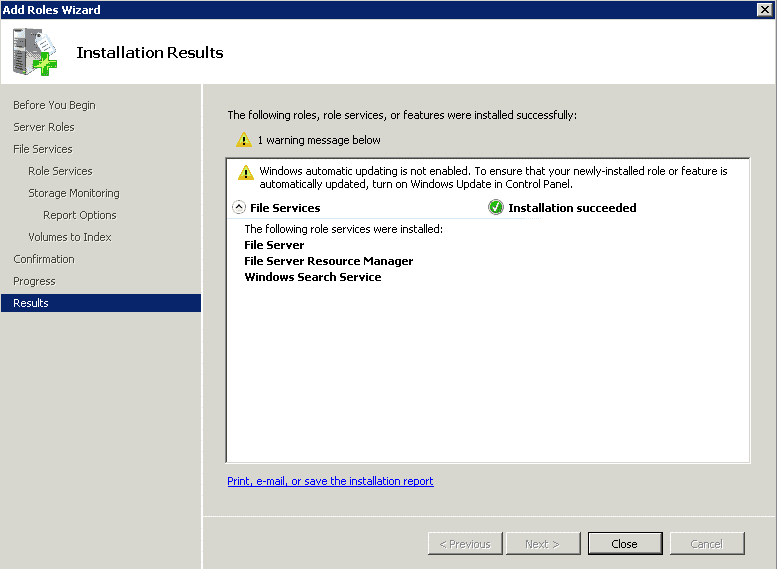
With the File Services role, you have also activated File Server Resource Manager (handles quotas and a few high-level functionalities) and the Share and Storage Management tools.
Share and Storage Management Console
To better manage storage volumes and shared folders, Microsoft redesigned the File services role and created the Share and Storage Management Console Windows Server 2008. Press the start button, go to Administrative Tools, and select Share and Storage Management to begin the process.
In this section, we will highlight the administrative tasks covered under the Share and Storage Management Console:
- Addition or elimination of disks or volumes to and from the server.
- You can enable or disable shared access (as per the need) to server resources.
- Depending on various factors allowing secure access to shared resources (files, volumes, etc.)
- Track the users accessing a resource and disconnect as per your requirement.
Steps to Add Storage to a File Server
More people are using Windows Server 2008, the higher is the demand for adding more and more information to the storage system. With such increasing demand for storage needs, soon a time will come when overbuilt file servers will require storage space to support burgeoning requirements. However, the process of adding storage to a file server is simple. Do you have a hardware RAID controller? If yes, follow the below-listed instructions for your RAID controller to add storage to a server.
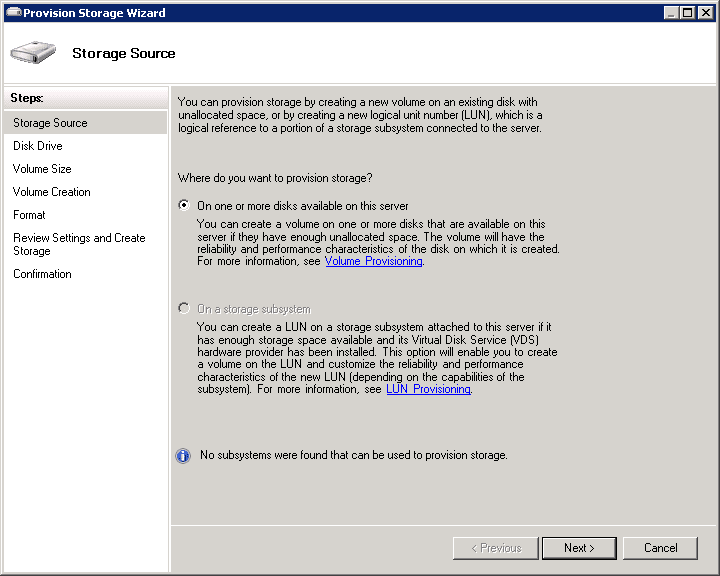
- Step 1 Click the start button> All programs> Administrative Tools, and select Share and Storage Management. Now, choose provision Storage from the Share and Storage Management console. Enjoy the tour and follow the necessary steps to activate a new hard disk. If no new storage exists, a notification will be sent to you indicating such.
- Step 2 As per the wizard, the first step indicates the location to which the storage should be provisioned. If one or more disk is attached to the server, select the first option visible on the screen. However, select the second checkbox (storage subsystem option) if the storage resides on a Fibre Channel or iSCSI SAN.
- Step 3 Move to the Disk Drive section in the left pane. Select the drive you want to add to the server.
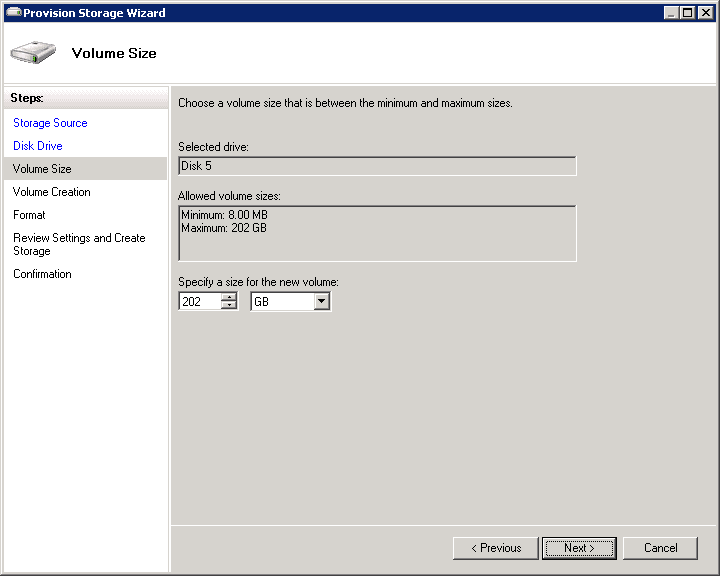
- Step 4 Once selected the drive, choose the volume size or space allocated to the new volume. Keep in mind; you have access to multiple logical volumes per physical disk.
- Step 5 Under Volume Creation, select the required volume you should mount on your server.
- Step 6 Go to the format section, decide the allocation unit size and whether volume must be formatted or not.
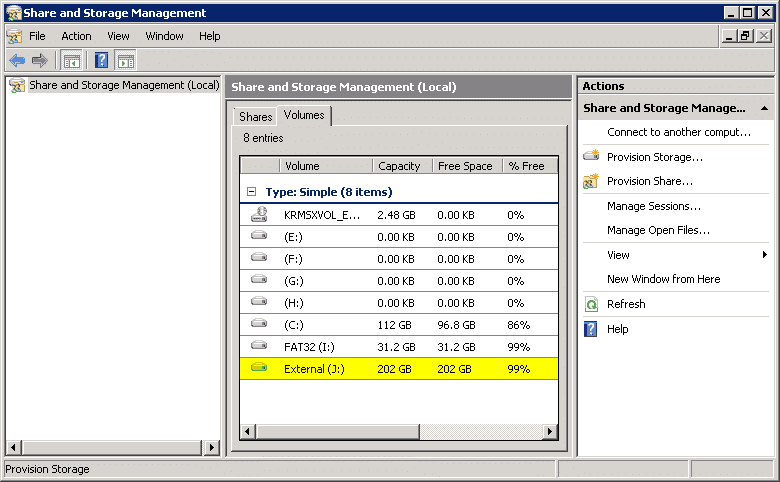
Once you have selected options as per your requirement, review the settings and press the create button. The wizard will begin with the process and update when completed. Now, select the volume tab from the work pane and check if your added volume is visible on your lab server.
Steps to Add and Secure a Shared Resource to the Server
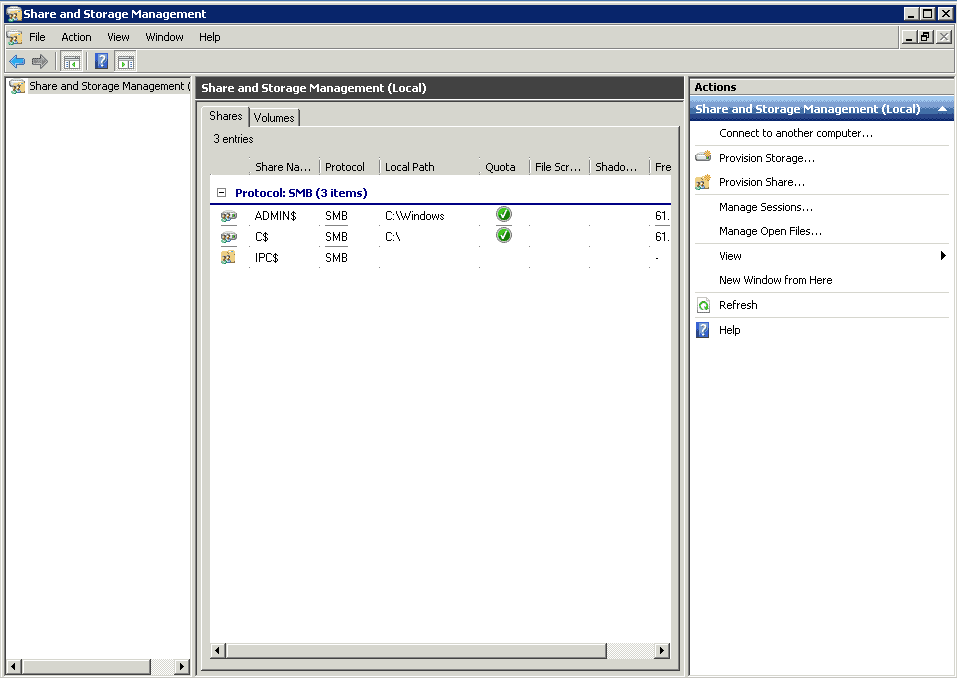
Earlier, we discussed how to install the File Services role. There you had a default list of shared resources on a Windows Server 2008 server with installed roles. In addition, we have shared a list that explains why default shared resources and your default shares differ based on configuration.
- Admin$ It points to the location where you installed Windows Server 2008. As per the default setting, it is C:\Windows.
- C$ Each drive accessible on the server is shared via administrative share. $ sign is used after the drive name to denote the administrative share.
- IPC$ Inter-Process Communication (IPC) supports communication processes and other devices, like computers.
- NETLOGON To verify the users on domain controllers
- SYSVOL Helps with the easy distribution of group policy information amid domain controllers.
For adding share to a Windows Server 2008-based file server, Microsoft offered a wizard that will ease the process for administrators. We will discuss how to add shares via the Share and Storage Management console rather than the traditional method of Windows Explorer. Follow the below-listed steps to add a Shared Resource to the Server:
- Step 1 Click the start button> All programs> Administrative Tools, and select Share and Storage Management. Now, click on the Action menu on top of the Share and Storage Management console. To start the wizard, click on Provision Share.
- Step 2 The first dialogue box will ask you to fill in the location where you want to share. Next, edit your location by clicking on the browse button on the dialogue box.
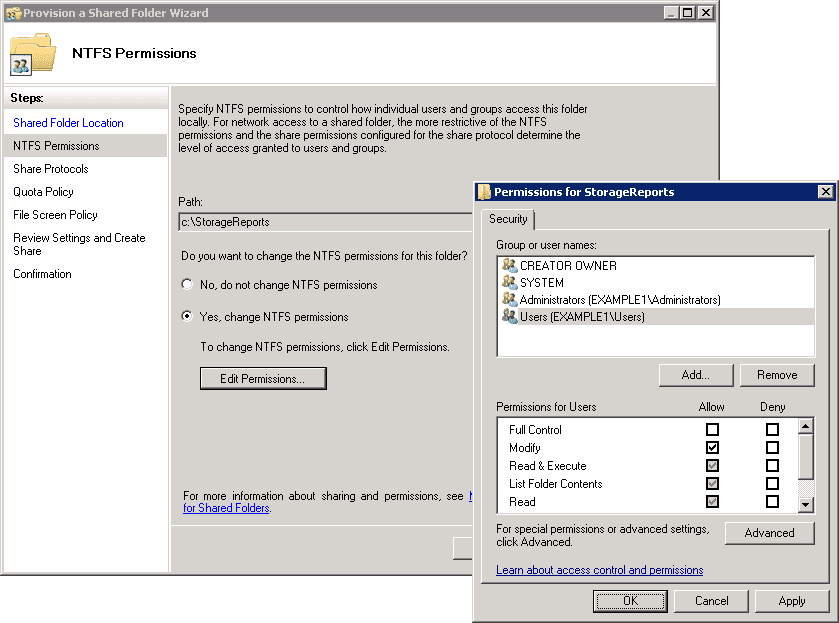
- Step 3 You have the right to assign access to limited users. Every time you open up access to a resource, allot access to only those individuals who require that access. To make changes to the default NTFS permission, go to the NTFS Permissions page of the wizard and change permissions as per the need. When you select the NTFS permission page, you have the Edit Permissions dialog box visible on the screen. Click on Edit Permissions, select an existing user from the permissions list or add a new user or group to the list. Decide as per your requirement.
- Step 4 The next task is to select the protocol(s) that have access to the share. Remember the NFS option will be available only if you have decided to set up the NFS portion of the File Services role. However, if you have not chosen NFS, then SMB (Server Message Block) will be available as per the windows default setting. Also, based on the folder name you have selected, the share name field is automatically selected.
- Step 5 Go to the SMB Settings page and add a share description that will be visible when a user browses the server. Next, scroll down the same page to the Advanced Settings. To make changes to these settings, press the Advanced button, and a dialogue box will appear. On the Advanced page dialog box, tick the checkbox stating Enable access-based enumeration. This feature helps limit users' visibility to the only folders that the user has access to. However, this add-on was not present in the previous versions of Windows Server.
- Step 6 Again, go back to the SMB Permissions page and take a call about how you want the users to access the available resources over a network. Keep in mind the SMB permissions are different from the NTFS permissions. We have already discussed NTFS permissions in the above points. Combine SMB permissions or share permissions with the NTFS permissions, and the most restrictive permissions will be applicable. It is best to set up SMB permissions to have full access and control by the administrators. The other users or groups will only have access to read and write. Also, only NTFS permissions can limit access to users.
- Step 7 We have skipped a few snapshots but will brief its purpose. Earlier, in the File Server Resource Manager tool, you created a quota template that can be used here on the Quota Policy page. This method helps save your available space and prevents other users from acquiring it. In the File Screen Policy page, the templates are managed by the File Server Resource Manager tool, thus making it easier for the administrators to allow or disallow file storage based on the file type. Lastly, to publish an SMB share, you need to visit the DFS Namespace Publishing page.
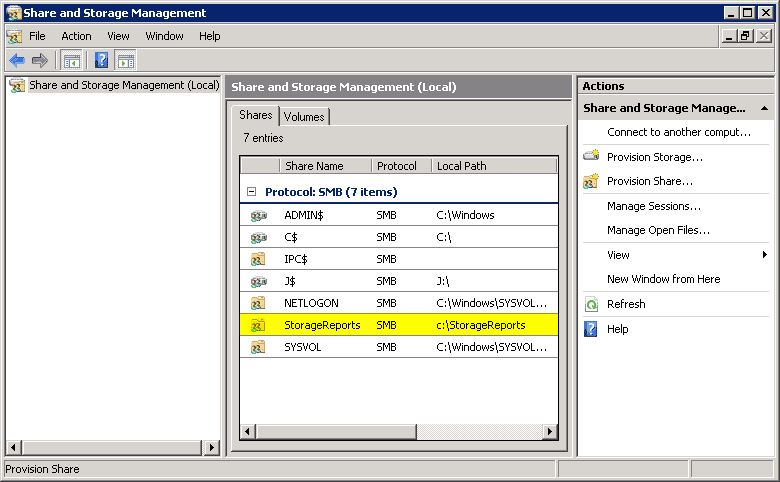
- Step 8 At last, visit the review page and overall look at your selections. Now, press the create button and click on the Shares tab in the Share and Storage Management console. Again, you can find your new share visible on the list.
Track and Monitor User Access to Shared Resources
Once the file server is completely set up and running, you can permit the users to access the server and perform administrative tasks. Regular administrative task performance keeps your server at a better working pace. Also, you can monitor who is accessing your server and exactly what information. Apart from this, you have the authority to disconnect a user if needed. You can accomplish all these tasks and features via the Share and Storage Management console.
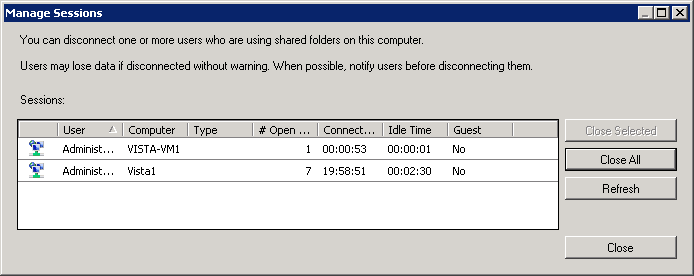
The minute you open the console, visit the Manage Sessions and Manage Open Files options at the top. Manage Sessions helps monitor users' overall access to the shares, whereas the Manage Open Files option updates which a user from a particular device can access files. For instance, if a user has seven files open on his system, a single session will be needed. Similarly, if the same user accesses another device and opens a server-based file, it will lead to creating another session.
For example, have a look at the screenshot, and two sessions are open. One from a device named Vista1 and the other named Vista-VM1. To shut a specific session, select the session and choose Close selection. To close all sessions together, choose Close All.
Now, open the Manage Open Files window. In the shared snapshot, you can view a file named Sample Document.txt is active and is run by a user named Administrator. You may also notice many other directories are open in the image. This is because every time you open a folder, it will be counted as an open file on the server.
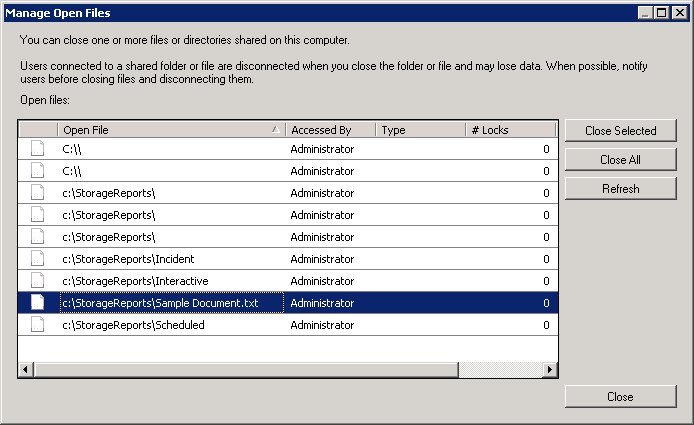
To close these open files or folders, select one and press Close Selected. To shut all files and folders, select the Close All button.
Summary
Microsoft has introduced many new features, updated older versions, and made many improvements to the File Services role in the Windows Server 2008. Apart from improving management capability, Microsoft has also worked on the SMB transport mechanism to deliver better results.
Windows Servers Share and Storage Management FAQs
What are some common share and storage management tasks?
Common share and storage management tasks include: creating and managing shared folders, setting permissions for shared folders, and monitoring and managing storage utilization.
How does share and storage management impact network performance?
Share and storage management can impact network performance by affecting the speed at which data is accessed and stored, and by reducing the amount of available storage space.
What are the benefits of using a centralized share and storage management solution?
The benefits of using a centralized share and storage management solution include: improved data security, better storage utilization, and simplified administration.
What are the different types of storage management solutions available?
The different types of storage management solutions include: network-attached storage (NAS), storage area networks (SAN), and cloud storage.
How do you choose a share and storage management solution?
Choosing a share and storage management solution requires considering factors such as the amount of data to be stored, the number of users that need access, and the required performance and security features.
What are the best practices for share and storage management?
Best practices for share and storage management include: using strong passwords and access control, regularly backing up data, and monitoring storage utilization to prevent overloading.

