
Our funding comes from our readers, and we may earn a commission if you make a purchase through the links on our website.
SCP – What is Secure Copy Protocol – Definition & Example
UPDATED: February 6, 2023
This article shows in-depth details about the Secure Copy Protocol, how to use it, the command syntax, and a few examples. In a nutshell, the SCP command is used as a secure and straightforward way to transfer files from computers via the SSH service.
What is SCP (Secure Copy Protocol)?
The Secure Copy Protocol or “SCP” helps to transfer computer files securely from a local to a remote host. It is somewhat similar to the File Transfer Protocol “FTP”, but it adds security and authentication.
The SCP runs on Port 22, and some people say that it’s a combination of the BSD RCP and the SSH protocol.
The RCP is used to transfer the files, and the SSH protocol provides authentication and encryption, so SCP can be considered a mixture of these two protocols.
The data that is being transferred remains confidential, so the SCP can be used to successfully block packet sniffers that can extract valuable information from the data packets.
The SCP can also benefit from using SSH because it allows the inclusion of permissions and timestamps for the file that needs to be uploaded.
How to use SCP?
The SCP client can upload files to the SSH server or request files and directories for downloading.
The server, in return, sends all the subdirectories and the files that are available for download. Note that, the server controls the file downloads so there can be security risks if the client is unintentionally connected to a malicious server.
SCP is a native command in most Operating Systems, such as MacOS, Windows, or Linux.
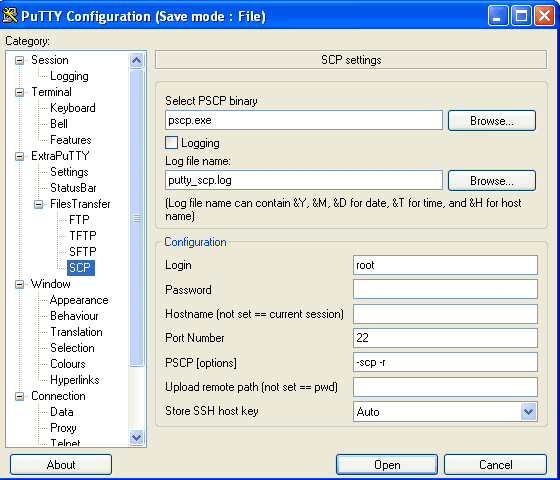
You can find it just by entering the “scp” command on the terminal line. But you can also find it in common network file transfer applications, such as PuTTy (ExtraPuTTy).
CP vs SCP: Understanding the Difference
If you have been using “cp command” on your local Linux machine, SCP won’t be difficult to understand. It is essential for both commands to have a source and destination file-system location to perform a copy operation. But the main difference here is that the SCP requires one or both of the locations to be on a remote system.
For instance, one might apply the below cp command:
cp /main/john/pictures/picture*.png /main/john/archive |
This command would initiate a copy operation, where all the files in the directory pictures in user john’s main directory with a name starting with picture.png” would be copied into the directory “archive” in the “main” directory.
The same operation can be performed using SCP command:
scp /main/john/pictures/picture*.png john@myhost.com:/main/john/archive |
As shown above, when using the SCP command with the login name John, those same files would be uploaded to the server myhost.com into the remote directory /main/john/archive. The SCP will let the uploading process initiate only if the user “john” provides his remote password.
A remote location could also be specified as a source if one needs to download the files. For instance,
scp john@myhost.com:/main/john/archive/picture*.png /main/john/downloads |
on myhost.com with the name starting with “picture and ending in .png,” into the local directory /main/john/downloads.
Using SCP on a Remote Location
It’s also possible if a remote host is specified as both the source and the destination. For example, using the command below, a file can be transferred from one remote directory, that is on myhost.com, to another directory that is on the same server.
scp someuser@myhost.com:/main/someuser/dira/file.txt someuser@myhost.com:/main/someuser/dirb |
In another case, SCP can be used when a file transfers from one host to the other. Use the following command:
| scp user@host1.com:/onedir/file.txt user@host2.com:/otherdir |
Take into account that the files that are transferred using SCP are secured and encrypted like the SSH and SFTP.
The SCP Command Syntax
Before going into the explanation of how the SCP command works, let’s take a look at its basic syntax:
scp [-12346BCpqrv] [-c cipher] [-F ssh_config] [-i identity_file] [-l limit] [-o ssh_option] [-P port] [-S program] [[user@]SRC_host:]file1 ... [[user@]DEST_host:]file2 |
Knowing what SCP is and how it works is only the beginning. There are tons of different options to choose from the SCP command. In this section, we will dig deep into understanding how the command works.
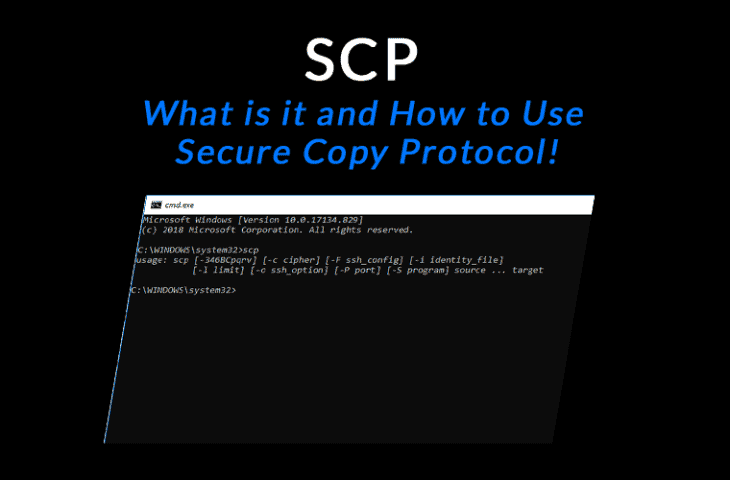
The following is a screenshot of the SCP command on Windows and a MacOS terminal. The command output varies from different OS.


- [-12346BCpqrv]
- -1
It’s an older protocol version. It tells the software to use SCP protocol 1. - -2
Same as above. It is an old protocol which drives the SCP to use protocol 2. - -3
It transfers the data between two remote hosts through the localhost. Without this, the data would be directly copied between the two remote hosts. It can also be used to disable the progress meter. - -4
With this, the SCP would use the IPv4 addresses only. - -6
With this, the SCP would use the IPv6 addresses only. - -B
This option would not let the SCP authenticate the session by asking the user to give the password. So, the required authentication method here would be non-interactive. - -C
It enables the compression of the encrypted connection by including the –C flag to the SSH.
- -1
- [-c cipher]
This option selects and uses the cipher to encrypt the data transfer. It is passed to the SSH session directly. - [-F ssh_config]
With this option, an alternative per-user configuration file would be specified for the SSH. It is sent to SSH directly. - [-i dentity_file]
It chooses the file which provides the identity (key) for RSA authentication. It is passed to the SSH directly. - [-I limit]
This option can be used to limit the bandwidth, which is in Kbps. - [-o ssh_option]
It can be applied to pass options to SSH using the same format as of the ssh_config. It is helpful to specify the options which have no separate SCP command-line flag.Some valid options can be:- AddressFamily:
This keyword can be used to configure IP address requirements. The specified address family can be either IPv4 or IPv6. - Batch-mode:
Use it to disable all the queries for user input. If one applies this option, the authentication methods with user interaction would no longer be supported. The argument can be set to “yes” or “no”. It is set to “no” by default. - BindAddress:
With this keyword, the specified address on the local machine can be used as the source address. This option is only useful if the system has more than one address. It is adviced that this option remains disabled if UsePrivilegedPort is active. - CheckHostIP:
If it is set to yes, the SSH will check the host IP address in the known_hosts file. So, SSH would be able to detect if the host key has been changed in case of the DNS spoofing. And, there will be no check if it’s set to “no.” Generally, it’s “yes” by default. - Ciphers:
It specifies different encrypted algorithms which are comma-separated and supported by the client. The cipher that is highest in the client’s order of preference is used for the given session and also supported by the server. The supported ciphers are “aes128-ctr”, “aes128-cbc”, “aes192-ctr”, “aes192-cbc”, “aes256-ctr”, “aes256-cbc”, “blowfish-cbc”, “arcfour”, “arcfour128”, “arcfour256”, “cast128-cbc”, and “3des-cbc”. You also have a choice to set this value to “none”. But with this option, the data will not be encrypted. It is not recommended as it provides no confidentiality protection.
- AddressFamily:
-
- Other possible SSH options are Compression, CompressionLevel, ConnectionAttempts, ConnectTimeout, IdentityFile, IdentitiesOnly, KexAlgorithms, and a lot more.
- -P port:
This option states the port needed to connect to, on the remote host. Keep in mind that this option has a capital “P”; small “p” is used for other tasks. - -p:
It is used to preserve access times, modification times, and modes from the original file. - -q:
It can be applied to disable the progress meter. - -r:
It can be used to copy the entire directories recursively. - -S program:
It specifies the name of the program that is used for the encrypted connection. It is essential for the program to understand the SSH options. - -v:
This is the verbose mode which forces SCP and SSH to show the debugging messages about the progress. It can be useful for troubleshooting connection, authentication, and configuration issues.
SCP Examples
For more understanding and clarification, let’s take a look at a few SCP examples. Remember to always specify the file with the URI form: [user@host]host[:port][/path/file]
For example,
scp file.txt user@example.computeruser.com:file.txt |
The previous command will copy file.txt to the remote host “example.computeruser.com.” The username that will be used to log in is, “user.”
scp username@remotehost.com:/main/hope/* |
The previous command will copy all the files that are in the remote directory “/main/hope” to the remote host “remotehost.com” into the local working directory.
scp -r john@host.com:/main/john/documents /main/john/downloads/documents |
This command will copy all the files that are in the remote directory “/main/john/documents” on the server host.com into the local directory “/main/john/downloads/documents.” The transfer would include all the subdirectories with their files.
scp -l 200 john@host.com:/main/john/archive.zip |
The previous command will initiate the transfer of the remote file “/main/john/archive.zip” on the remote host “host.com” into the local working directory. The process would be initiated as the user “john”, and the transfer rate would be limited to 200 kilobytes per second.
scp john@1sthost.com:/files/file.zip robert@2ndhost.com:/archives |
This command will copy the file that is in the remote directory “/files/file.zip” on the remote host “1sthost.com” into the remote directory “/archives” on the other remote host “2ndhost.com”. You will be required to type the passwords for the remote accounts “john@1sthost.com” and “robert@2ndhost.com”, respectively. The files will be directly transferred from one remote host to another.
scp -3 john@1sthost.com:/files/file.zip robert@2ndhost.com:/archives |
Its operation is almost similar to the above command, but instead of initiating the direct file transfer from one remote host to the other, the transferred files would go through the localhost.
Summary
The SCP is a straightforward command yet powerful enough to provide secure file transfer between a local to a remote host. It is relatively similar to SFTP because it runs on the session layer and uses port 22.
The SCP command is based on the SSH and is also very secure. Unlike SFTP, it can’t remove or list files on the remote server. Although SCP can only transfer files, it can do it significantly faster than SFTP.
It is a handy command for users that spend a lot of time on the SSH protocol, like fast transferring speeds, and don’t care about managing the remote server.
SCP FAQs
How does SCP work?
SCP works by establishing an encrypted SSH connection between the client and server and copying files over the secure connection.
What is the difference between SCP and FTP?
SCP is a secure file transfer protocol, while FTP (File Transfer Protocol) is an insecure protocol. SCP uses encryption to secure the file transfer, while FTP does not.
Can SCP be used to transfer files between different operating systems?
Yes, SCP can be used to transfer files between different operating systems, as long as both the client and server have SCP support.
How secure is SCP compared to other file transfer protocols?
SCP is more secure compared to other file transfer protocols as it uses encryption to secure the file transfer.
What are the advantages of using SCP?
The advantages of using SCP include: security, reliability, and ease of use. SCP transfers are encrypted and authenticated, making them less vulnerable to eavesdropping or tampering.
How do you use SCP to transfer files?
To use SCP to transfer files, you will need an SCP client and access to an SCP server. The client will then establish an encrypted connection to the server and copy the files over the secure connection.
Are there any limitations to using SCP?
SCP can be slower than other file transfer protocols due to the encryption process, but this is typically outweighed by the security benefits. Additionally, some SCP implementations may have limitations in terms of the maximum file size that can be transferred.

