
Our funding comes from our readers, and we may earn a commission if you make a purchase through the links on our website.
Tftp Client for Windows 7

UPDATED: July 22, 2021
Windows 7 has a Built-in TFTP Client that can be easily and quickly enabled to let you transfer files locally or remotely using TFTP protocol without the need for additional 3rd Party Software.
In order to get the client up and running, you'll need to follow the steps below to first install the Client and then ensure that your Firewall (if you have one) will allow the transfer of files to and from your machine.
Installation
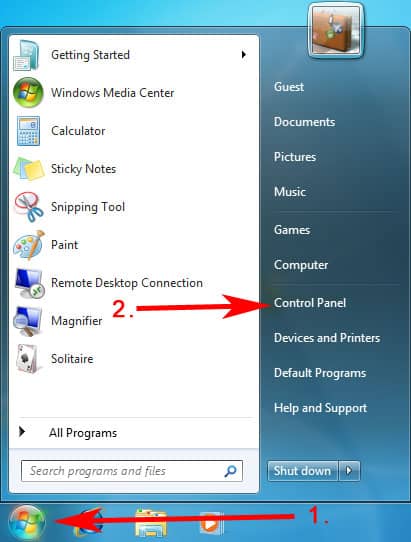
- Click on your START button at the Bottom Left corner of the Screen and click on CONTROL PANEL
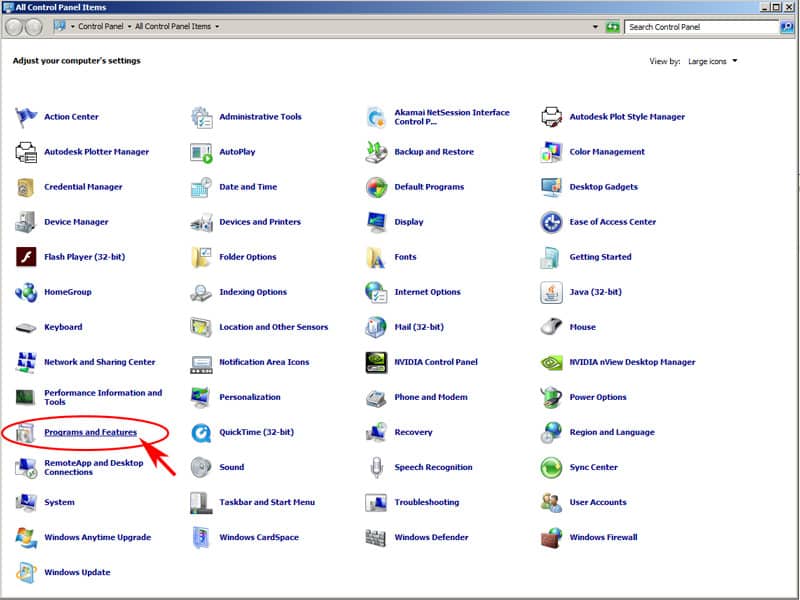
- The Control Panel will then open up. You'll want to Click on Programs and Features
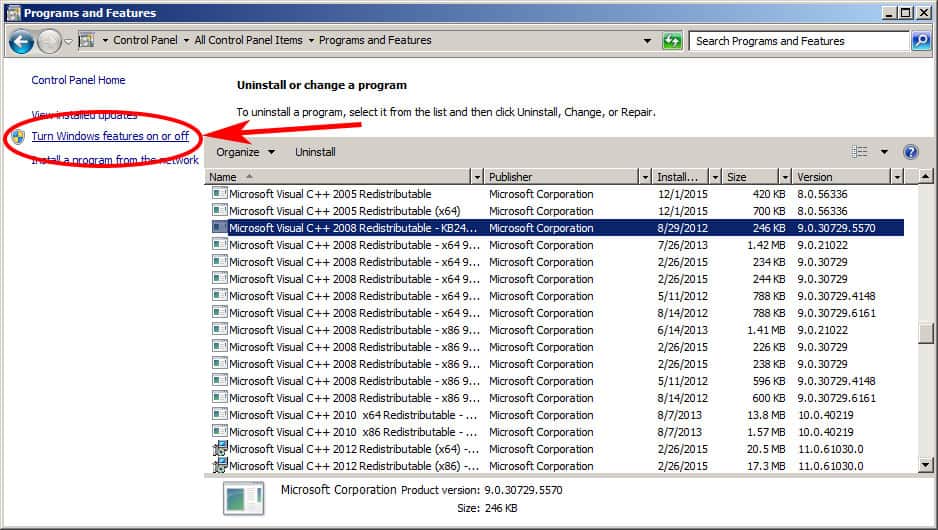
- The Programs and Features Dialog box will then open, and you'll need to click on Turn Windows features on or off on the Left side menu
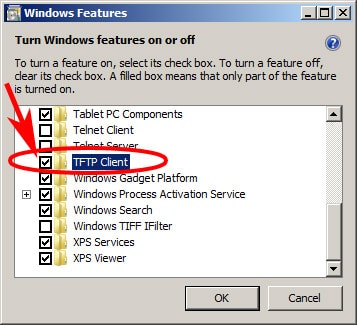
- The Windows Features dialog box will then Pop-up. Scroll down until you see the TFTP Client check box and CHECK it. (Make sure the box is CHECKED like in the screenshot below)
- Press the OK button and wait for the Software to install. (This process can take a couple minutes.)
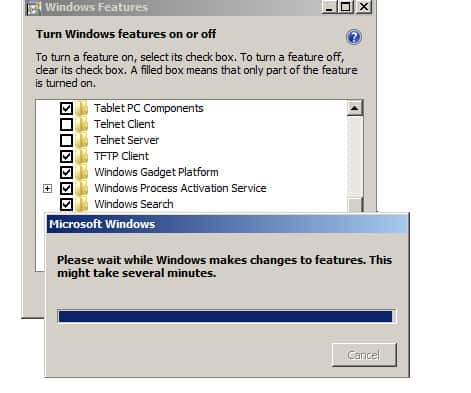
- When the TFTP Client has finished installing, the “Please wait while Windows makes changes to Features. This might take Several minutes.” dialog box will disappear. Click on the OK button to close the Windows Feature box. Your TFTP Client is now installed.
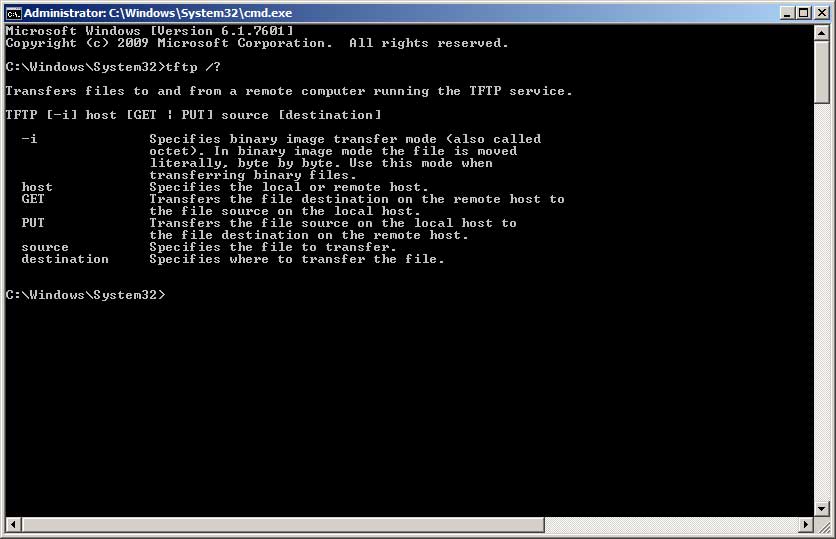
- To Use the software, you will need to open a Command Prompt window and type in TFTP and any of the following commands, as pictured below in the screenshot.


Firewall Exceptions for TFTP Client in Windows 7
Before you can start using the client to send or get files, you'll need to ensure that the Windows Firewall (or any 3rd Party firewall software you have installed) has an Exception specified to allow the inbound/outbound transfer of files using the TFTP client we just installed.
If you are using the built-in Windows Firewall, you'll need to do the following:
- Click on START > then click on Control Panel
- When the Control Panel windows opens, Click on Windows Firewall
- Within the Windows Firewall window, on the Left Side of the Window, click on the link that says Allow a program or feature through the Windows Firewall
- You should now see the “Allowed Programs” window. Click on the button at the bottom right that says Allow another program…
- You should now see the “Add a Program” window. You will Not find the TFTP option if you scroll down – instead, you will need to Browse for the program. Click the BROWSE button. This will allow you to specify a path to the TFTP.exe file.
- When the Browse dialog box comes up, it should have opened in C:\Windows\System32 folder. Scroll down til you find TFTP.EXE and double-click on it.
- Click the Add button in the “Add a Program” window, as you now have added the Path C:\Windows\System32\TFTP.EXE.
- Once your back at the “Allowed Programs” box, the Trivial File Transfer Protocol App should be highlighted. You can now choose which Network you want to allow that program to have access too. Choose either “Domain“, “Home/Work“, or “Public“.
- Press the OK button to finish the process.
You should now have the ability to PUT or GET files using the Windows 7 TFTP client utility through the command line using the commands pictured above.
Related Post: Best Pop Up Ad Blocker

