
Our funding comes from our readers, and we may earn a commission if you make a purchase through the links on our website.
Schedule (or Automate) Powershell Scripts using Task Scheduler & Other Scripts!

UPDATED: November 19, 2020
PowerShell is now a defacto standard for all Windows task automation and configuration management— and for a good reason.
When you pair a PowerShell script to run automatically with the Microsoft Windows Task Scheduler, the opportunities are endless.
You can automatically run any script with a conditional trigger, such as an event, date, and an action, so that you can take your hands off the wheel.
But Powershell can do more than that.
It can influence the way tasks are created.
You can go beyond and create a Powershell script that creates scheduled tasks.

In this post, we’ll go through the process of scheduling the execution of a Powershell script, using two methods, one with the Windows Task Scheduler GUI and the other by using a series of Powershell cmdlets.
Create a Task with Task Scheduler GUI
The Windows Task Scheduler allows you to craft automated tasks to run on schedule, due to some event, or even influenced by other tasks.
For example, you can set Windows to automatically run specific applications at a schedule and at different time intervals.
You can also set it to display messages on your desktop when a certain threshold is reached.
In this section, we’ll create a task with the Windows Task Scheduler.
- How to open Windows Task Scheduler?
The most straightforward way to open Task Scheduler is to type “Scheduler” or “task scheduler” on the Window’s search bar. You can also open the “Run” window with the Windows + R keys and type “taskschd.msc”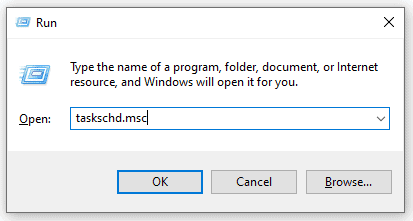
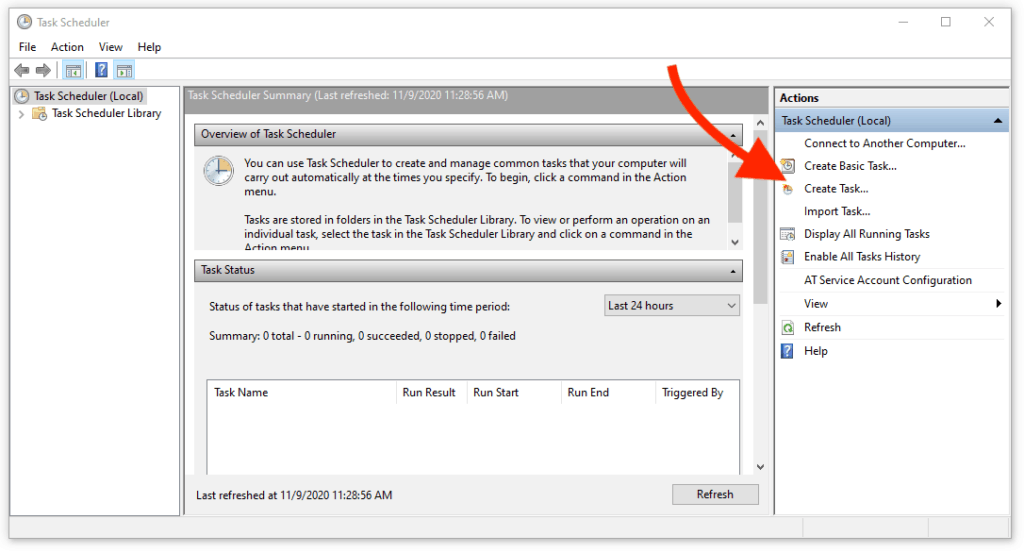
- Once you open the Task Scheduler, go to the Actions panel on the right side of the window and click on “Create Task”.
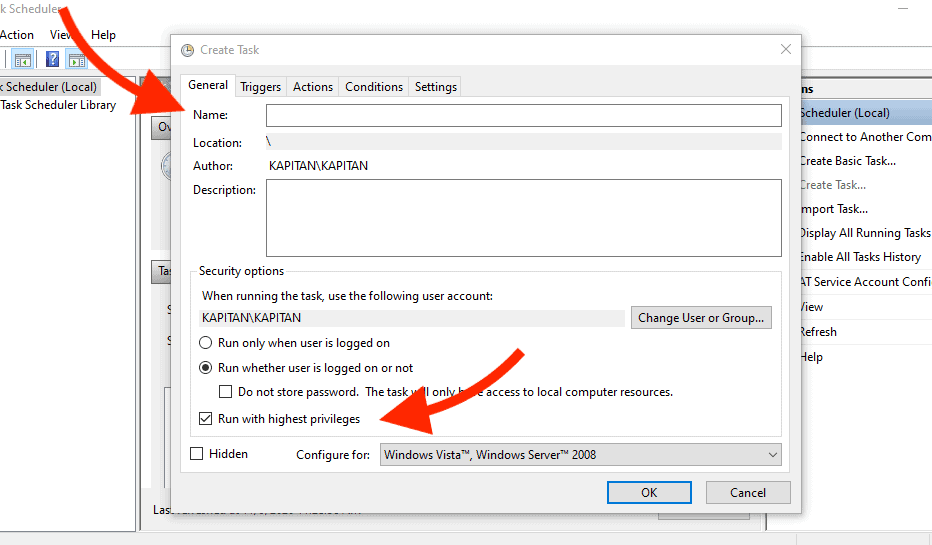
- When the “Create Task” window opens, make sure you are in the “General” tab and give the new task a Name.
- Depending on the type of task you are running, you might want to give your new task “administrator privileges” so that it can have the highest level of access to the computer. You can also set it to run, “whether the user is logged or not.”
- Create a Trigger
- Go to the “Triggers” tab.
A trigger is what makes the task start— it can be anything from a schedule, when a computer goes on or idle, a certain event occurs, another task gets executed, a user connects/disconnects, etc.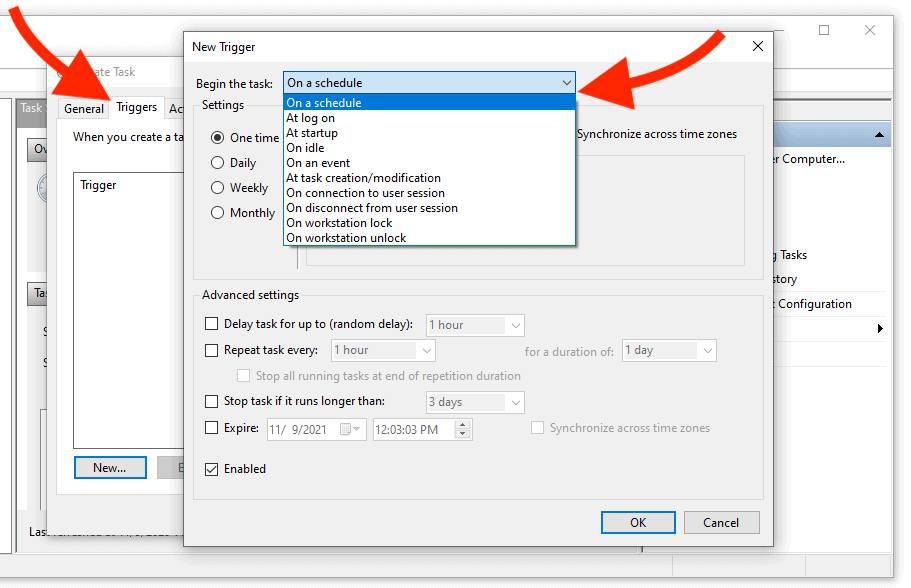
- In this example, we’ll configure an “On an event” task trigger. When an event occurs, our task will be triggered. In this Window, you’ll need to define several settings, specifically:
- Settings (Basic or Custom):
Basic settings give you the options within the Task Scheduler; with custom, you’ll need to create an even filter or provide an XML file. - Log:
Your computer creates logs in the following areas, Application, Security, System, and custom (built by other apps). Within this list, you can select the type of log that identifies the event. - Source:
Determine the name of the software that is logging the event. - Event ID:
Set up specific event IDs.
- Settings (Basic or Custom):
- For example, we’ll configure a task to run when Windows detects a successful logon. We’ll set up Log: Security, Source: EventLog, and EventID:4624. The event ID: 4624 is when Windows detects a successful logon

- Now, let’s set up the Action.
You can define three different actions that the task must run once a trigger (or condition) is met. You can configure the task to display a message, send an email, or start a program. Since what we want is to automate a Powershell script, let’s go for “Start a Program.”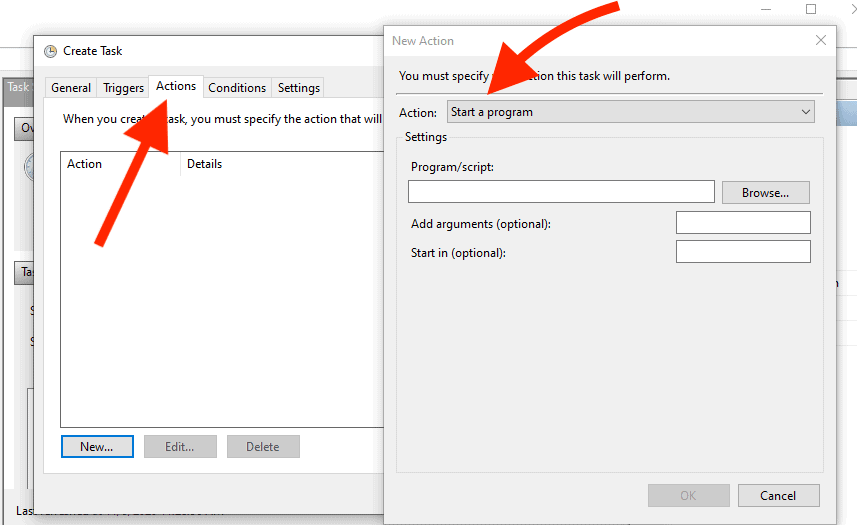
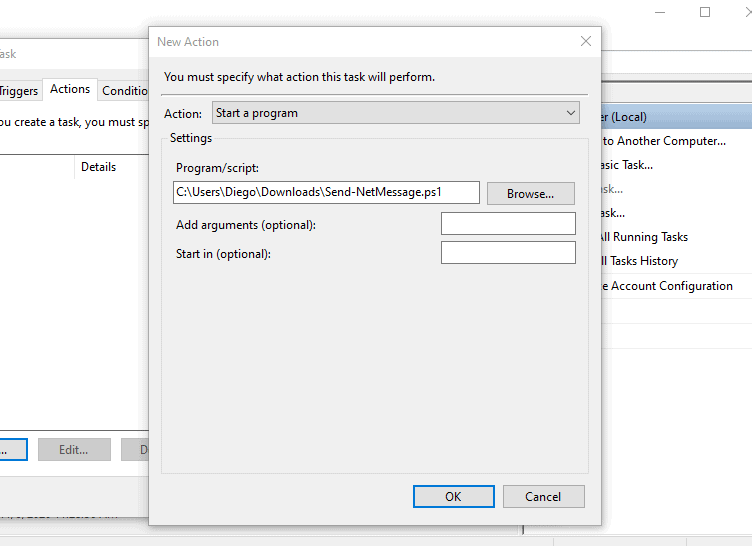
- Below, in the Settings section, select the Powershell script (or program) that will run due to the trigger.
- In our example > If Windows detects a successful logon > it will immediately send a NetMessage to a remote computer. The Powershell script for sending a message can be found here, Send-NetMessage.ps1.
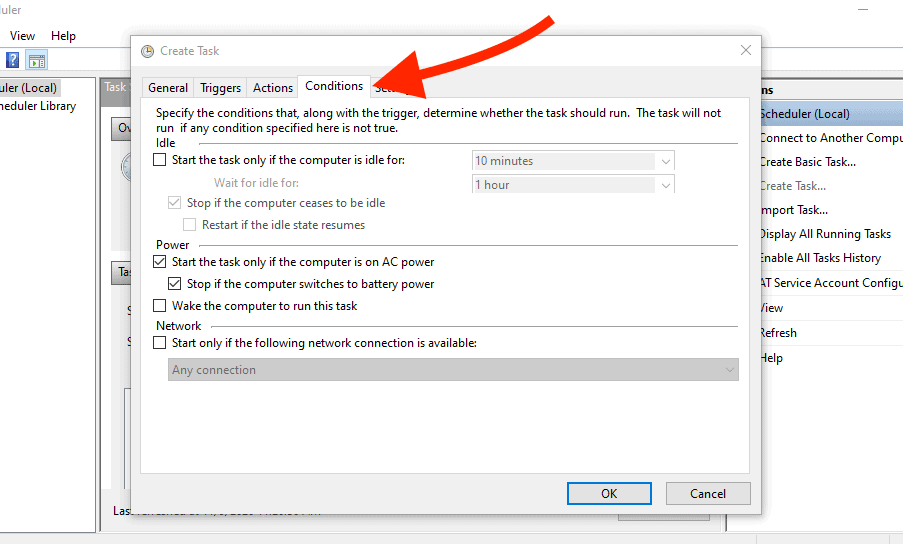
- Conditions: This configuration goes hand in hand with the triggers because a condition can cancel a task at the last second. IF the conditions are met, run the task, but if any of these conditions are not met, THEN don’t run the task. There are three categories under Conditions: Idle, Power, and Network.
- In our example > If Windows detects a successful logon > it will immediately send a NetMessage to a remote computer. The Powershell script for sending a message can be found here, Send-NetMessage.ps1.
- For our example, we’ll leave these settings as default.
- Additional Settings:
The last tab, “Settings,” allows you to configure the task further. You can make the task to run again if it fails, to stop after some time, to delete it, etc. We’ll leave the settings as default.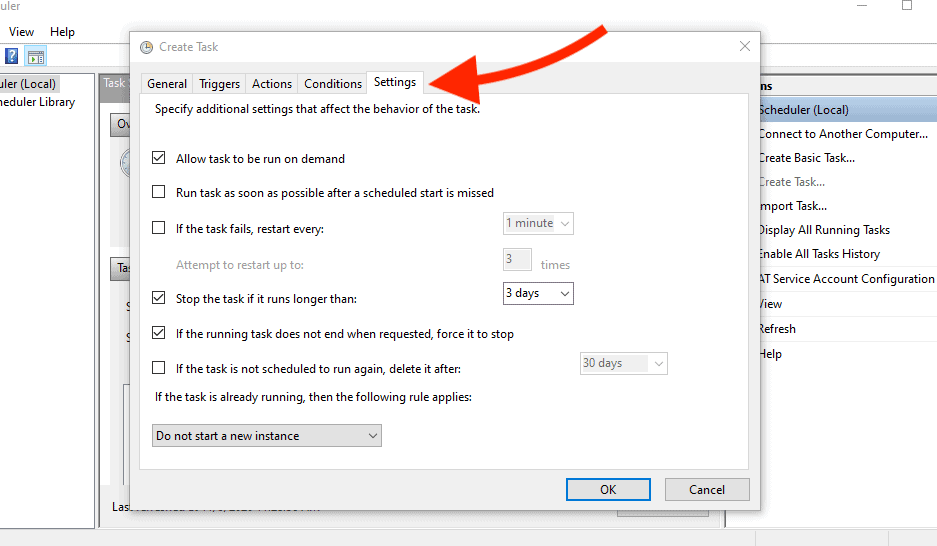
- Specify the User/Password:
Once you finish all the task’s configuration, the Task Scheduler will ask you to specify the user account for running the task.
Bear in mind that if you assign a particular user account to log on to the computer using the Task Scheduler service, it will need to have permission to run batches.
Windows is likely to show you the message: “This Task Requires That The User Account Specified Has Log On As Batch Job Rights”. So make sure that the user’s right is assigned to the Log on as a batch job.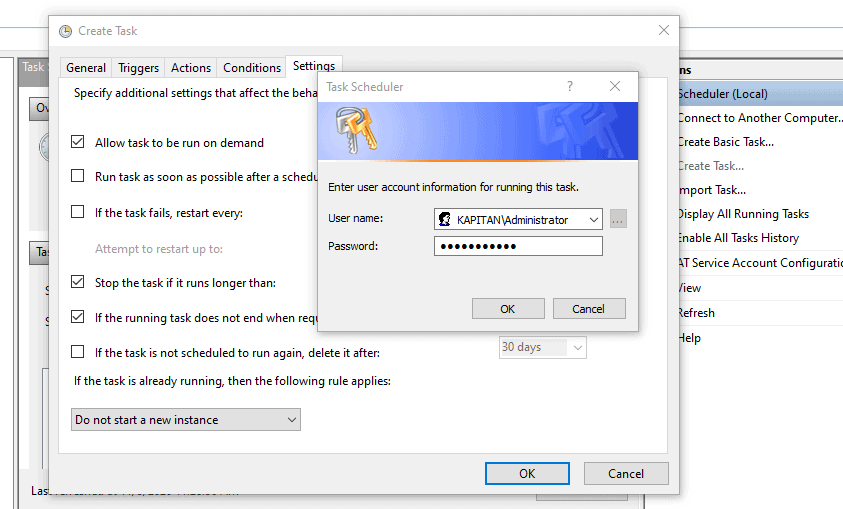
Verifying and Maintaining the Scheduled Tasks
You can now find your freshly created automatic task (with a Powershell script) by going to the Task Scheduler Library. Make sure your task’s status is on Ready.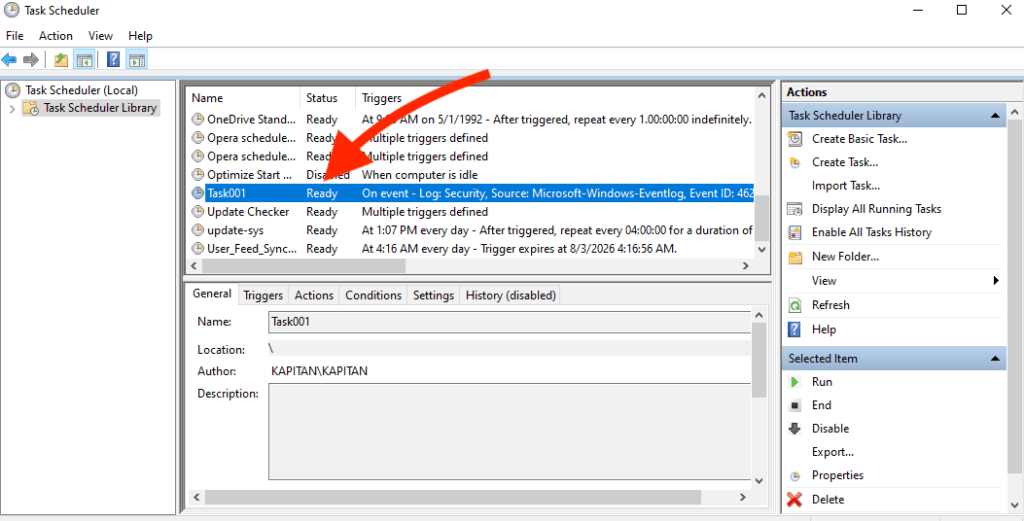
From this library, you can also run tasks on-demand, End (if it is in progress), disable it, export it, or remove it. If you want to edit your task, double click on it.
If the scheduled task is not running, after the trigger and conditions are met, then check the following:
- Make sure you entered the right username/password.
- Ensure the Scheduler service is up and running. Go to Services via the run window, again win+R keys, then type services.msc. Go through the list of services and identify the Task Scheduler service. If possible, change it to Automatic.
Creating Scheduled Tasks with PowerShell Cmdlets
Creating a single task with the Windows Task Scheduler GUI is not that complicated as you previously learned.
But when you have (as a systems admin) to be creating scheduled tasks daily and repeatedly throughout the day, it might be a better idea to automate the very thing that is taking your time: creating tasks.
With help from Powershell scripts, you can create scheduled tasks (that automate PS scripts) more conveniently.
First, to create the tasks easier and not have to write objects one by one from the command line, let’s make sure you have the TaskScheduler module.
If you are using Windows Powershell 2.0 to create the scheduled task, you need to have the TaskScheduler module.
- If you are running Windows Powershell 2.0, let’s go ahead and install the TaskScheduler module. To import the Powershell module, using Powershell 2.0 use the following command:
Import-Module TaskScheduler
The Powershell 3.0 introduced many new modules and Scheduler Tasks cmdlets, making it much more convenient to create tasks.
The most useful cmdlets are New-ScheduledTaskTrigger, New-ScheduledTaskAction, and Register-ScheduledTask.
Now, let’s create the task and configure its trigger. The New-ScheduledTaskTrigger creates the trigger object for the new scheduled task. Here, you can specify triggers like time, events, and more.
# Determine the Trigger

$trigger= New-ScheduledTaskTrigger –Daily -At 12:00am
Let’s specify the action.
Just as shown before, the parameter refers to the actions to be performed at execution. The New-ScheduledTaskAction represents the actions. The following command opens up PowerShell and runs a specific script.
# Specify the Action

$action= New-ScheduledTaskAction -Execute "PowerShell.exe" -Argument "C:\Scripts\Script.ps1" -UserName Admin -Password xxxx
Save the scheduled task. The line Register-ScheduledTask saves the new task on the local computer. Specify the already created values for trigger and action to associate with the task.
# Specify and save the name of the task

Register-ScheduledTask -TaskName "NewTask-002" -Description "Win Logon Status Reports" -Trigger $trigger -Action $action
Aside from the example above, you can also use other cmdlets, like the New-ScheduledTaskSettingsSet, which as the Task Scheduler GUI, gives you a good number of settings to modify the behavior of the task.
Some of the popular settings are:
- [-DisallowDemandStart]
- [-DeleteExpiredTaskAfter <TimeSpan>]
- [-Disable]
- [-RunOnlyIfIdle]
- [-IdleWaitTimeout <TimeSpan>]
- [-NetworkId <String>]
- [-NetworkName <String>]
- [-DisallowStartOnRemoteAppSession]
- [-MaintenancePeriod <TimeSpan>]
- [-MaintenanceDeadline <TimeSpan>]
- [-StartWhenAvailable]
- [-WakeToRun]
- [-IdleDuration <TimeSpan>]
- [-RestartOnIdle]
- [-DontStopOnIdleEnd]
- [-ExecutionTimeLimit <TimeSpan>]
One of the disadvantages of using cmdlets, is that you won’t be able to create an event-based trigger as is possible with the MS Task Scheduler GUI.
Conclusion
Creating a single task to run a Powershell script via the Windows Task Scheduler GUI can be a set-it-and-forget-it configuration.
But when you have to configure several tasks every day with the same parameters, the process becomes monotonous.
Creating automatic scheduled-controlled tasks using Powershell scripting's very same power can be a better approach.
Thanks to the new availability of Schedule Tasks cmdlets, automated scheduling can be taken to a new level.

