
Our funding comes from our readers, and we may earn a commission if you make a purchase through the links on our website.
Raspbian – Raspberry Pi OS Guide
UPDATED: March 24, 2023
The Raspberry Pi is a tiny computer originating in the UK initially made to provide cheap computers for educational purposes. However, since the release of the Raspberry Pi, it has extended its application far past education.
In this guide, we’ll be looking over the history of the Raspberry Pi and its operating system, its iterations, interesting facts, as well as what you could do with one.
What Is The Raspberry Pi?
The Raspberry Pi is a small computer that is not so much bigger than the size of a credit-card made by the Raspberry Pi Foundation.
The Raspberry Pi enjoys a wide audience of tinkerers, programmers, and DIY enthusiasts around the world. This is because it is both a cheap computer for smaller projects and a fun tool to tinker with.
There’s been a wide variety of projects made using the Raspberry Pi. From Pi-controlled robots vacuuming their owner’s houses to retro gaming consoles that let you play your favorite childhood games. With that being said, not all of Pi’s uses are that niche. Powerful home media devices have been made using it, in addition to its capability of running scripts to make certain parts of your life easier.
Although the Pi has become far more than what its creators anticipated, it can not do everything. So it’s also important for you to be aware of what the Pi is not. The Pi isn’t capable of running traditional installations of Windows, although it is capable of operating as a desktop computer by using a variety of Linux distributions. With that being said, the Pi is much weaker than most modern computers, you shouldn’t be purchasing a Raspberry Pi in order to replace your desktop computer, as you may find yourself disappointed at the lack of modern OS features.
The biggest benefit of the Raspberry Pi is its versatility and ability to put a lot of hardware into what amounts to a very cheap body. It’s the ideal board for hobbyists or those that want a bit more of a hands-on approach to learning programming. It is also finding its place being used in IoT networks due to its small size and low power demands.
The Raspberry Pi Operating System
Every Raspberry Pi board comes with the official Raspberry Pi OS. Initially titled Raspbian, it is an Operating System made specifically for the Raspberry Pi. Although the first instances of the board weren’t running this OS, the Raspberry Pi Foundation quickly created it, so any board after June 2012 was compatible with it.
The initial version of the Raspbian OS was made by Mike Thompson and Peter Green as an entirely independent endeavor. The Operating System was rooted in Debian, which is a kind of Linux operating system. This puts the Raspbian OS firmly into the UNIX-Like family of operating systems.
The initial versions of the Raspbian operating system were 32-bit and Debian-based. However, more recent editions of the OS have switched to being 64-bit, and have abandoned the use of Debian as their base.
The Raspberry Pi OS was made specifically with the Raspberry Pi in mind, and it’ll run on every single kind of Raspberry Pi board, apart from the Pico edition, due to its far smaller size and computing power. The Raspberry Pi OS uses a modified version of the Lightweight X11 Desktop Environment(or LXDE) as its desktop environment. LXDE is a desktop environment specifically made for single-chip computers and those with low resources.
It uses an Openbox stacking window manager together with its own unique theme to bring a cohesive and unique user experience. Each distribution of the OS will come with an algebra program called Wolfram Mathematica, as well as the Minecraft: Pi Edition game, in addition to a hyper-lightweight version of Chromium.
Let’s take a look at each of these pre-installed components individually:
Wolfram Mathematica
Wolfram Mathematica is the most-used pre-installed section of the Raspberry Pi OS for robotics. It’s a technical computing system useful for a variety of computing areas such as machine learning, engineering, and neural networks. It was initially conceptualized by Stephen Wolfram and is currently developed by the Wolfram Research of Champaign institution.
The program only takes instructions in its own language- Wolfram.
Within the program, you can structure your documents in a cell-based hierarchy, which allows you to outline and section a document, as well as making it easy to index them. You can also present your documents in a slideshow manner. Even notebooks and similar documents can be analyzed, converted, and modified in Mathematica.
Instead of using the standard front-end of Mathematica, you can use the Wolfram Workbench, which is an IDE rooted in Eclipse. It gives you a variety of project-based dev tools for the program, in addition to helping with debugging and testing.
Minecraft Pi Edition
The Minecraft: Pi Edition is a kind of Minecraft made specifically for the Raspberry Pi. It’s based on the 0.6.1 edition of Minecraft Pocket Edition, with slightly less features. It has a changed set of features, and supports a variety of programming languages. It was made for educational purposes, and it encourages the user to interact with its world through an API.
Although much more bare-bones than any other official version of Minecraft, the Minecraft Pi is an excellent way to get to grips with Pi programming, or game programming in general. If you don’t have an interest in that, or it has outlived its usefulness as a learning tool, it’s still a nice game to pass the time with. Alternatively, nothing stops you from uninstalling the program.
Chromium
Chromium is an open-source version of the most popular web browser in the world- Google Chrome. While it can be quite the challenge to run Chrome on a Pi device(and is nigh-impossible on the Pi OS,) it comes with the open-source version pre-installed.
For the most part, the Chromium web browser is the same as Google Chrome. There are some auxiliary features that are missing, and you might struggle to get Netflix or Amazon Prime to work on it, but apart from that kind of niche use, it’s a great, lightweight web browser.
Originally, the Raspberry Pi OS has Epiphany as their default web browser. They switched to Chromium only once it got a redesigned desktop.
Main Features
Like any other OS, the Raspberry Pi has some unique features that set it apart from others, as well as familiar components that will make it easier for brand new users to get some use out of it.
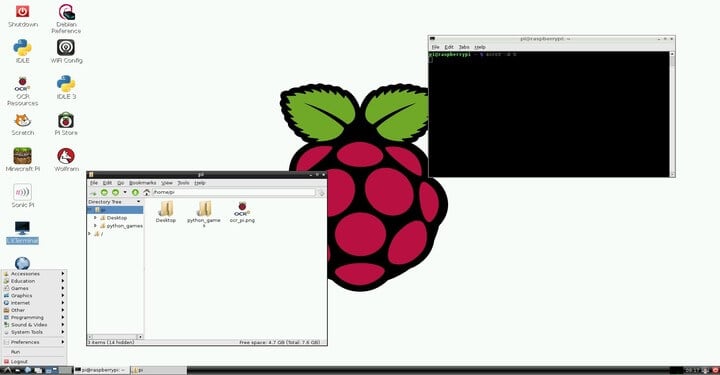
The UI
The user interface of the Raspberry Pi OS is quite similar to most other operating systems such as Ubuntu Linux, Windows, and macOS. You’ll find a menu bar at the top of the screen, containing an app menu with set shortcuts to the Terminal, Chromium, and the OS’s File Manager. The right side has Bluetooth, WiFi, and volume menus, alongside a digital clock.
Managing Packages
The default Recommended Software app for installing packages is APT. You can use a GUI wrapper for APT(the Add/Remove Software tool) to add new packages or remove existing ones. If you’ve ever used a Linux distro, this is quite similar to most of them.
Other Components
PCManFM is a relatively new component of the Raspberry Pi OS. It allows you to quickly access all of the sections of your Pi, and it was added to the OS in its first Raspberry Pi OS Buster release.
The OS is also packaged with a variety of beginner-friendly IDEs like the Thonny Python IDE, Mu Editor, and Greenfoot. It also has some other educational, programming-oriented software such as Scratch and Bookshelf.
Setting Up The Raspberry Pi OS
The Raspberry Pi OS features 4 different installation options:
- Raspberry Pi OS Lite The smallest of the bunch. It is the most bare-bones version of the Raspberry Pi OS. It doesn’t come with a Desktop Environment.
- Raspberry Pi OS The standard installation which only has the Pixel Desktop Environment
- Raspberry Pi OS Full The full installation includes the Desktop Environment alongside a variety of other productivity software.
- Raspberry Pi OS Buster A Desktop version of the Raspberry Pi OS.
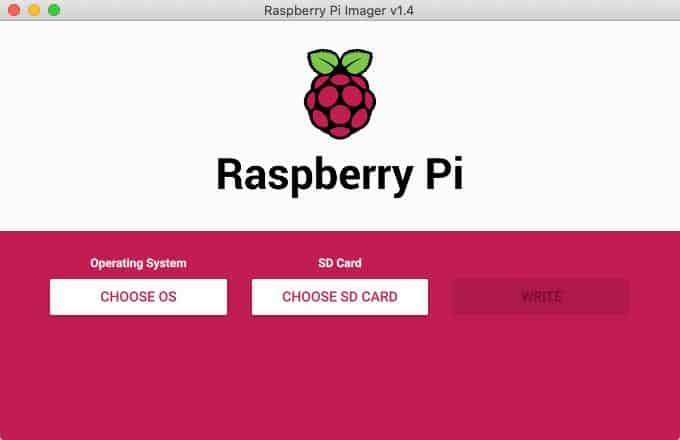
Each of these can be downloaded as a .img disk image file. After you’ve downloaded it, you’ll need to flash it on a microSD card where the Raspberry Pi OS will run. Back in March 2020, the Raspberry Pi Foundation gave us access to the Raspberry Pi Imager, which is a custom-made disk flasher enabling the installation of the Raspberry Pi OS as well as some other OS’ made for the Raspberry Pi.
So, how do you get the Raspberry Pi Imager onto your device?
Use The Raspberry Pi Imager
The Raspberry Pi Imager is the easiest way of downloading the Raspberry Pi OS. It’ll automatically download the image as well as put it onto the SD card. It’s worth noting that it is only compatible with Mac OS, the latest version of Ubuntu, and Windows.
In case you want to use the Imager on the Pi itself, then you can do this by installing the imager through the terminal of the Pi by using the command “sudo apt install rpi-imager”.
- Connect your SD card reader with the SD card containing the installation
- Open up the Imager, and then choose the OS you want out of those offered
- Pick the SD card you want the OS to be written to
- Check if you’ve done everything right before you click “WRITE”
- You’re done! The Raspberry Pi OS will be installed on your device
If you’re using the Imager on Win 10 with your Controller Folder Access setting turned on, you’ll have to give the Raspberry Pi Imager permission in order to write to your SD card. If you don’t, you’ll get a “failed to write” error from the imager.
Using other tools
If you don’t want, or aren’t able to use the Imager, then you’ll need to first download the image, and then write it to your SD card.
If you’re downloading the standard Raspberry Pi OS, then you’ll want to do so through the official Raspberry Pi site above. If you’re downloading an alternative Pi OS, then check third-party vendors for the distribution you’d like.
It’s likely that you’ll need to unzip the .zip file that your .img of the Pi OS comes in order to write it to your SD card.
It’s notable that the Pi OS desktop image is in a zip archive over 4GB. Furthermore, since it uses the ZIP64 format, there are some programs that won’t be able to unzip it. Thankfully, there’s a free tool for each operating system that you can use to unzip it:
- For Windows: 7Zip
- For macOS: The Unarchiver
- For most Linux distros: Unzip
Now, writing the image to an SD card can be done differently depending on which OS you’re on.
How you write the image to the SD card will depend on the operating system you are using. You can check the official Raspberry Pi site to see how to do this.
Afterward, you just need to put the SD card into your Pi and turn it on.
If you’re using the official Raspberry Pi OS, then you’ll need to log in by hand. The default username being pi, with the password raspberry.
History of The Raspberry Pi
The Inception of the Raspberry Pi
The Raspberry Pi finds its origins within the University of Cambridge, with the project starting up in 2006. Lead by scientist Eben Upton, together with his team of Alan Mycroft, Rob Mullins, and Jack Lang, these 4 were concerning themselves that their recent undergrads were growing further and further apart from technical aspects of computing. They blamed this on a school system that emphasises the usage of computers far more than it does their understanding.
The name, Raspberry, comes from a homage to older computer companies giving themselves names after fruits, such as Apple, Apricot Computers, acorn, and others. The “Pi” part of the name comes from the team’s original idea to make a tiny computer capable only of running Python. Today, the Raspberry Pi can be programmed with a variety of different object-oriented languages including JavaScript, Ruby, C++, Java, and others.
This concern is what sparked the start of the Raspberry Pi foundation. The foundation dedicated the following 6 years to create a device that was both affordable and accessible, which would help institutions teach computing skills like programming. This would, they hoped, help students figure out more about how computers work, rather than just using them.
The Raspberry Pi first released in February 2012. From that point on, the Raspberry Pi continued development, resulting in a wide variety of revisions. From its inception, the Raspberry Pi was available in two models- Model A and Model B.
- Model A The cheaper and simpler of the two as a general rule. It only has one USB port and no Ethernet connector. With that being said, it’s still a great educational tool.
- Model B Generally more expensive and advanced model of the two. It contains 2 USB ports as well as Ethernet connectivity support. Although marginally more expensive, for personal use, the Model B tends to outperform its cousin by a significant margin.
After The First Raspberry Pi
Raspberry Pi 2
February 2015 marked the release of the Raspberry Pi 2 Model B. It was packed with improved features, ranging from its 32-bit quad-core ARM Cortex-A7 processor with 1 GiB RAM to its increased overclocking capacity.
Raspberry Pi Zero
After came Raspberry Pi Zero. Its main standout feature was that it was even smaller than the usual Raspberry Pi. Well, apart from the price. Although the Zero had reduced its I/O and GPIO capabilities, it cost a mere $5 upon its release in November of the same year. February 28th of 2017 featured the release of the Zero W model, which was a kind of Raspberry Pi Zero, just with both Wi-Fi and Bluetooth supported. This led to a small price increase, putting it at $10. The final Zero model was released in January of 2018, called Raspberry Pi Zero WH. This was a version of the Raspberry Pi Zero W, just with pre-soldered GPIO headers.
Raspberry Pi 3
The Raspberry Pi 3 Model B released in February of 2016, packed with a 1.2GHz 64-bit ARM processor on-board, as well as in-built WiFi, USB boot, and Bluetooth support. This version was quickly improved in the Raspberry Pi 3 Model B+, which had a quicker, 1.4 GHz processor, as well as a tripled Ethernet speed. The WiFi capabilities of the device were also increased, in addition to bringing in the first Pi to support network booting. The Raspberry Pi 3 A+ also came out the same year, as a cheaper and less powerful version of its B+ counterpart.
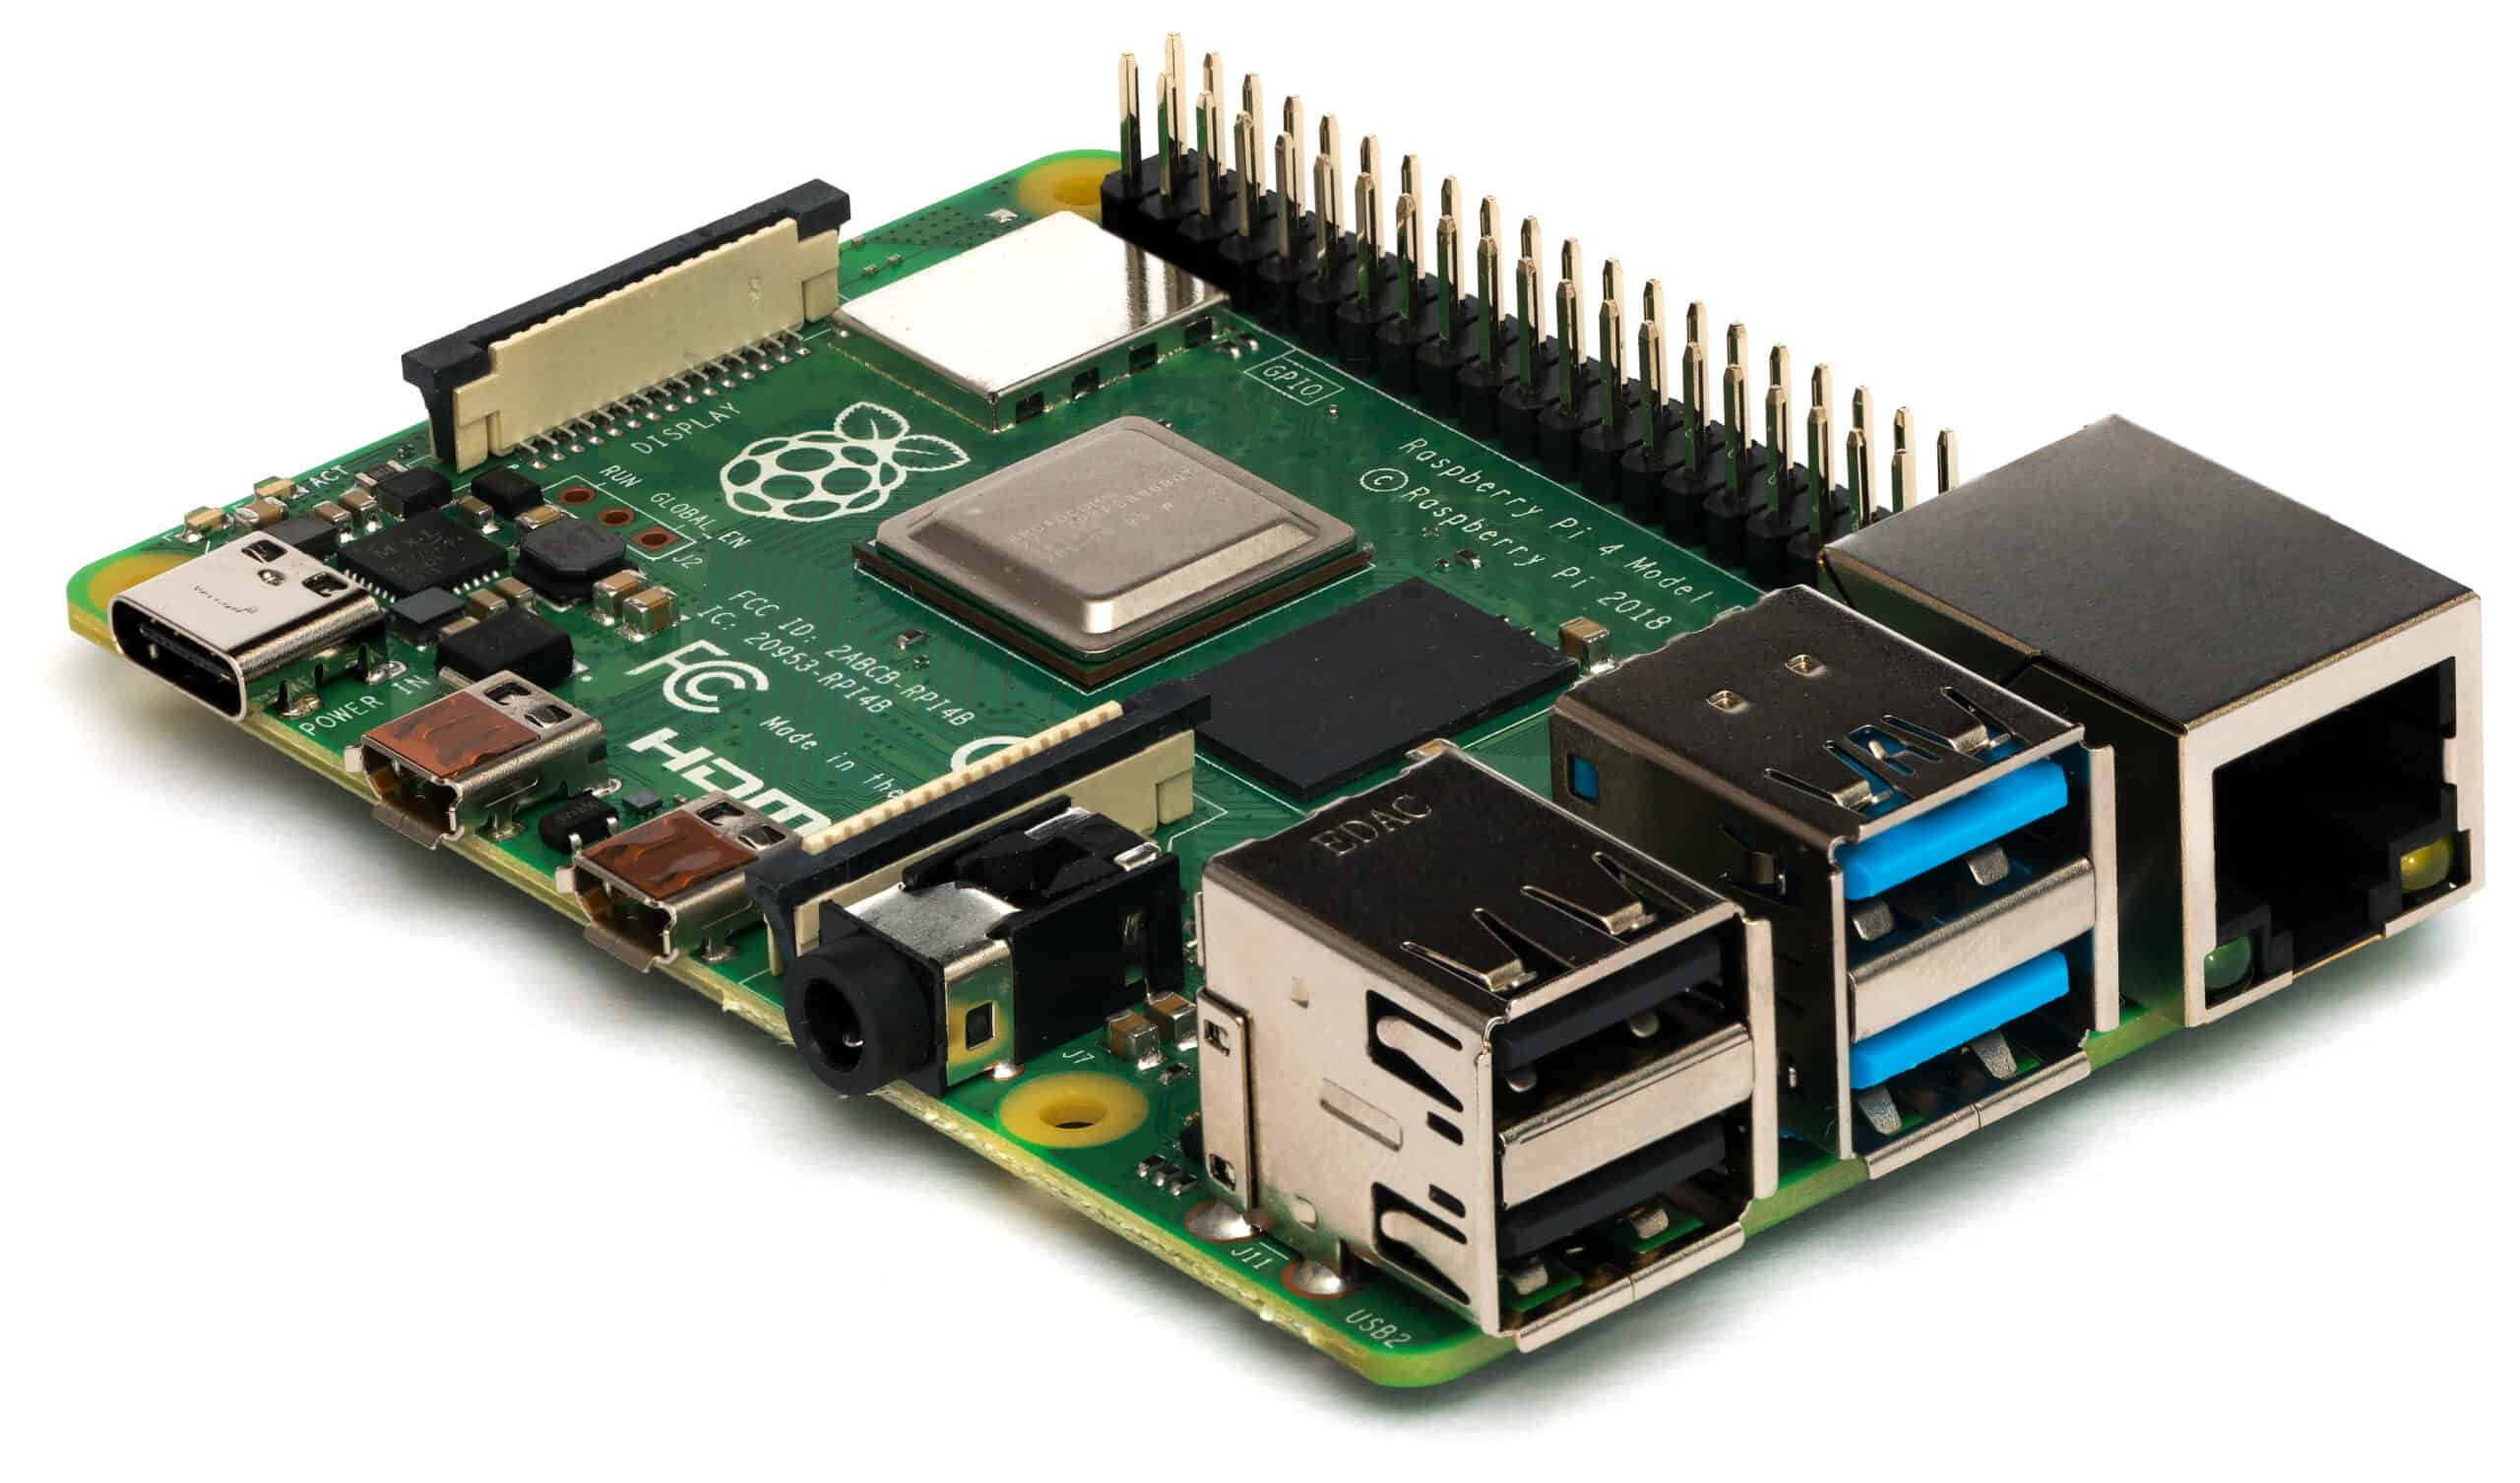
Raspberry Pi 4
The final “standard” model of the Raspberry Pi came out in June of 2019. The Raspberry Pi 4 Model B came with a stronger, processor at 1.5 GHz, as well as support for Bluetooth 5 and full Gigabit Ethernet capabilities. It has two USB 2.0 and USB 3.0 ports, in addition to supporting two monitors through an HDMI cable, making it possible to attain a 4k resolution. The Raspberry Pi Foundation also made the decision to switch to USB-C ports for powering the Pi, giving its peripherals some help in getting to power. With that being said, this edition of the Raspberry Pi was marked with an in-built flaw, which did not let 3rd party charging cables that were e-marked to power the device. Thankfully, this was changed in the Pi 4’s revision 1.2, which came out in the later parts of 2019. In 2020, a version of the Raspberry Pi 4 supporting 8GB of RAM is released, enabling it to handle much more RAM-intensive projects.
Raspberry Pi 400 Kit
The Raspberry Pi 400, released in November 2020 is an edition of the Raspberry Pi derived from the Pi 4. It comes with a custom board, and the original Pi 4 was remodeled in order to accommodate an attached keyboard. It also features a different, Commodore 64-like cooling system, which lets its processor get clocked at 1.8GHz. This edition of the Raspberry Pi is much closer to a standard Desktop PC, however, it only features 4GiB of RAM.
Raspberry Pi Pico
The Raspberry Pi Pico was released in January of 2021, with its selling price starting at a mere $4. This was the first, and so far only, Pi board to be based on just one chip- The RP2024. The microchip was designed specifically for the Raspberry Pi Pico. It comes with 264KiB of RAM and 2MiB flash memory. While this is a laughable amount for a modern-day PC, it’s an incredible amount of value for just $4. It features a bit of a narrow range of programming languages, specifically, C, CircuitPython, and MicroPython. This is the only version of Raspberry Pi so far to not support the Raspberry Pi OS
Is it right for you?
The Raspberry Pi OS, as well as the boards themselves, have undergone a variety of changes throughout the years.
With the board starting out as something you could piece together with a solder and some materials, and the OS starting out as a simple variation of Debian. Today, both of them are stand-alone and useful for far more than their initial, education-only designation would suggest.
There are hundreds of projects made using the Raspberry Pi OS daily, with the Pi’s various derivatives finding their niches in different projects, DIY and professional alike.
With that being said, the Raspberry Pi OS is a bit lacking as the only OS on your desktop. For one, it can’t stream Amazon or Netflix very well. Furthermore, it has few advantages over most Linux distros. On the other hand, it’s an excellent secondary OS to use for programming and Pi development.
If that’s what you need it for, then the Pi OS is practically integral in any Pi tinkerer’s toolkit.
Raspbian – Raspberry Pi OS Guide FAQs
What is Raspberry Pi?
Raspberry Pi is a series of small, low-cost, single-board computers designed to promote the teaching of basic computer science in schools and developing countries.
What are the specifications of a Raspberry Pi?
The specifications of a Raspberry Pi vary depending on the model, but typically include a Broadcom CPU, 1GB or more of RAM, on-board Ethernet, and support for a variety of inputs and outputs, such as HDMI, USB, and GPIO.
What can I do with a Raspberry Pi?
A Raspberry Pi can be used for a wide range of projects, including media centers, game consoles, desktop computers, and Internet of Things (IoT) devices. It can also be used for programming and educational purposes, such as teaching computer science and electronics.
How do I get started with Raspberry Pi?
To get started with Raspberry Pi, you will need a Raspberry Pi board, a power supply, an SD card with the operating system installed, and a display and keyboard (or you can use a remote connection). Once you have these components, you can connect them and power on the Raspberry Pi to start using it.
What operating systems can run on a Raspberry Pi?
A variety of operating systems can run on a Raspberry Pi, including Raspberry Pi OS (formerly known as Raspbian), Ubuntu, and other Linux distributions, as well as Windows 10 IoT Core.
Is a Raspberry Pi suitable for use as a regular desktop computer?
While a Raspberry Pi can be used as a desktop computer, its limited processing power and limited memory may make it unsuitable for demanding applications, such as video editing or gaming. However, it can be a suitable choice for basic computing tasks, such as web browsing and word processing.

